Over the past two years, I have been (very slowly) building a homemade DIY weather station and data logger using a network of sensors and Raspberry Pi’s. My plan all along has been to collect as much data as I can from sensors in my back yard, and get the rest of the data from the National Weather Service. I recently got to the stage where it was time to add sensors. The first sensors I added were temperature, humidity, and barometric pressure.
The biggest challenge of thermometry, especially in a climate like Arizona, is obtaining accurate temperature readings when you routinely have to deal with extreme heat and intense sun. The solution is to use a solar radiation shield, which is an enclosure in which you can mount temperature sensors, which blocks the sun, but still allows ample air flow over the sensor so you can obtain accurate temperature measurements without access to shade.
Unfortunately, quality solar radiation shields that actually work can be rather expensive. Solar radiation shields for just the cheap outdoor thermometers you buy at the hardware store generally run $50 to $100. When you have multiple sensors you need to house (I have 3), it can quickly become prohibitively expensive. For avid DIY enthusiasts like me, coupled with being a cheap skate at times, building one from scratch was a no brainer.
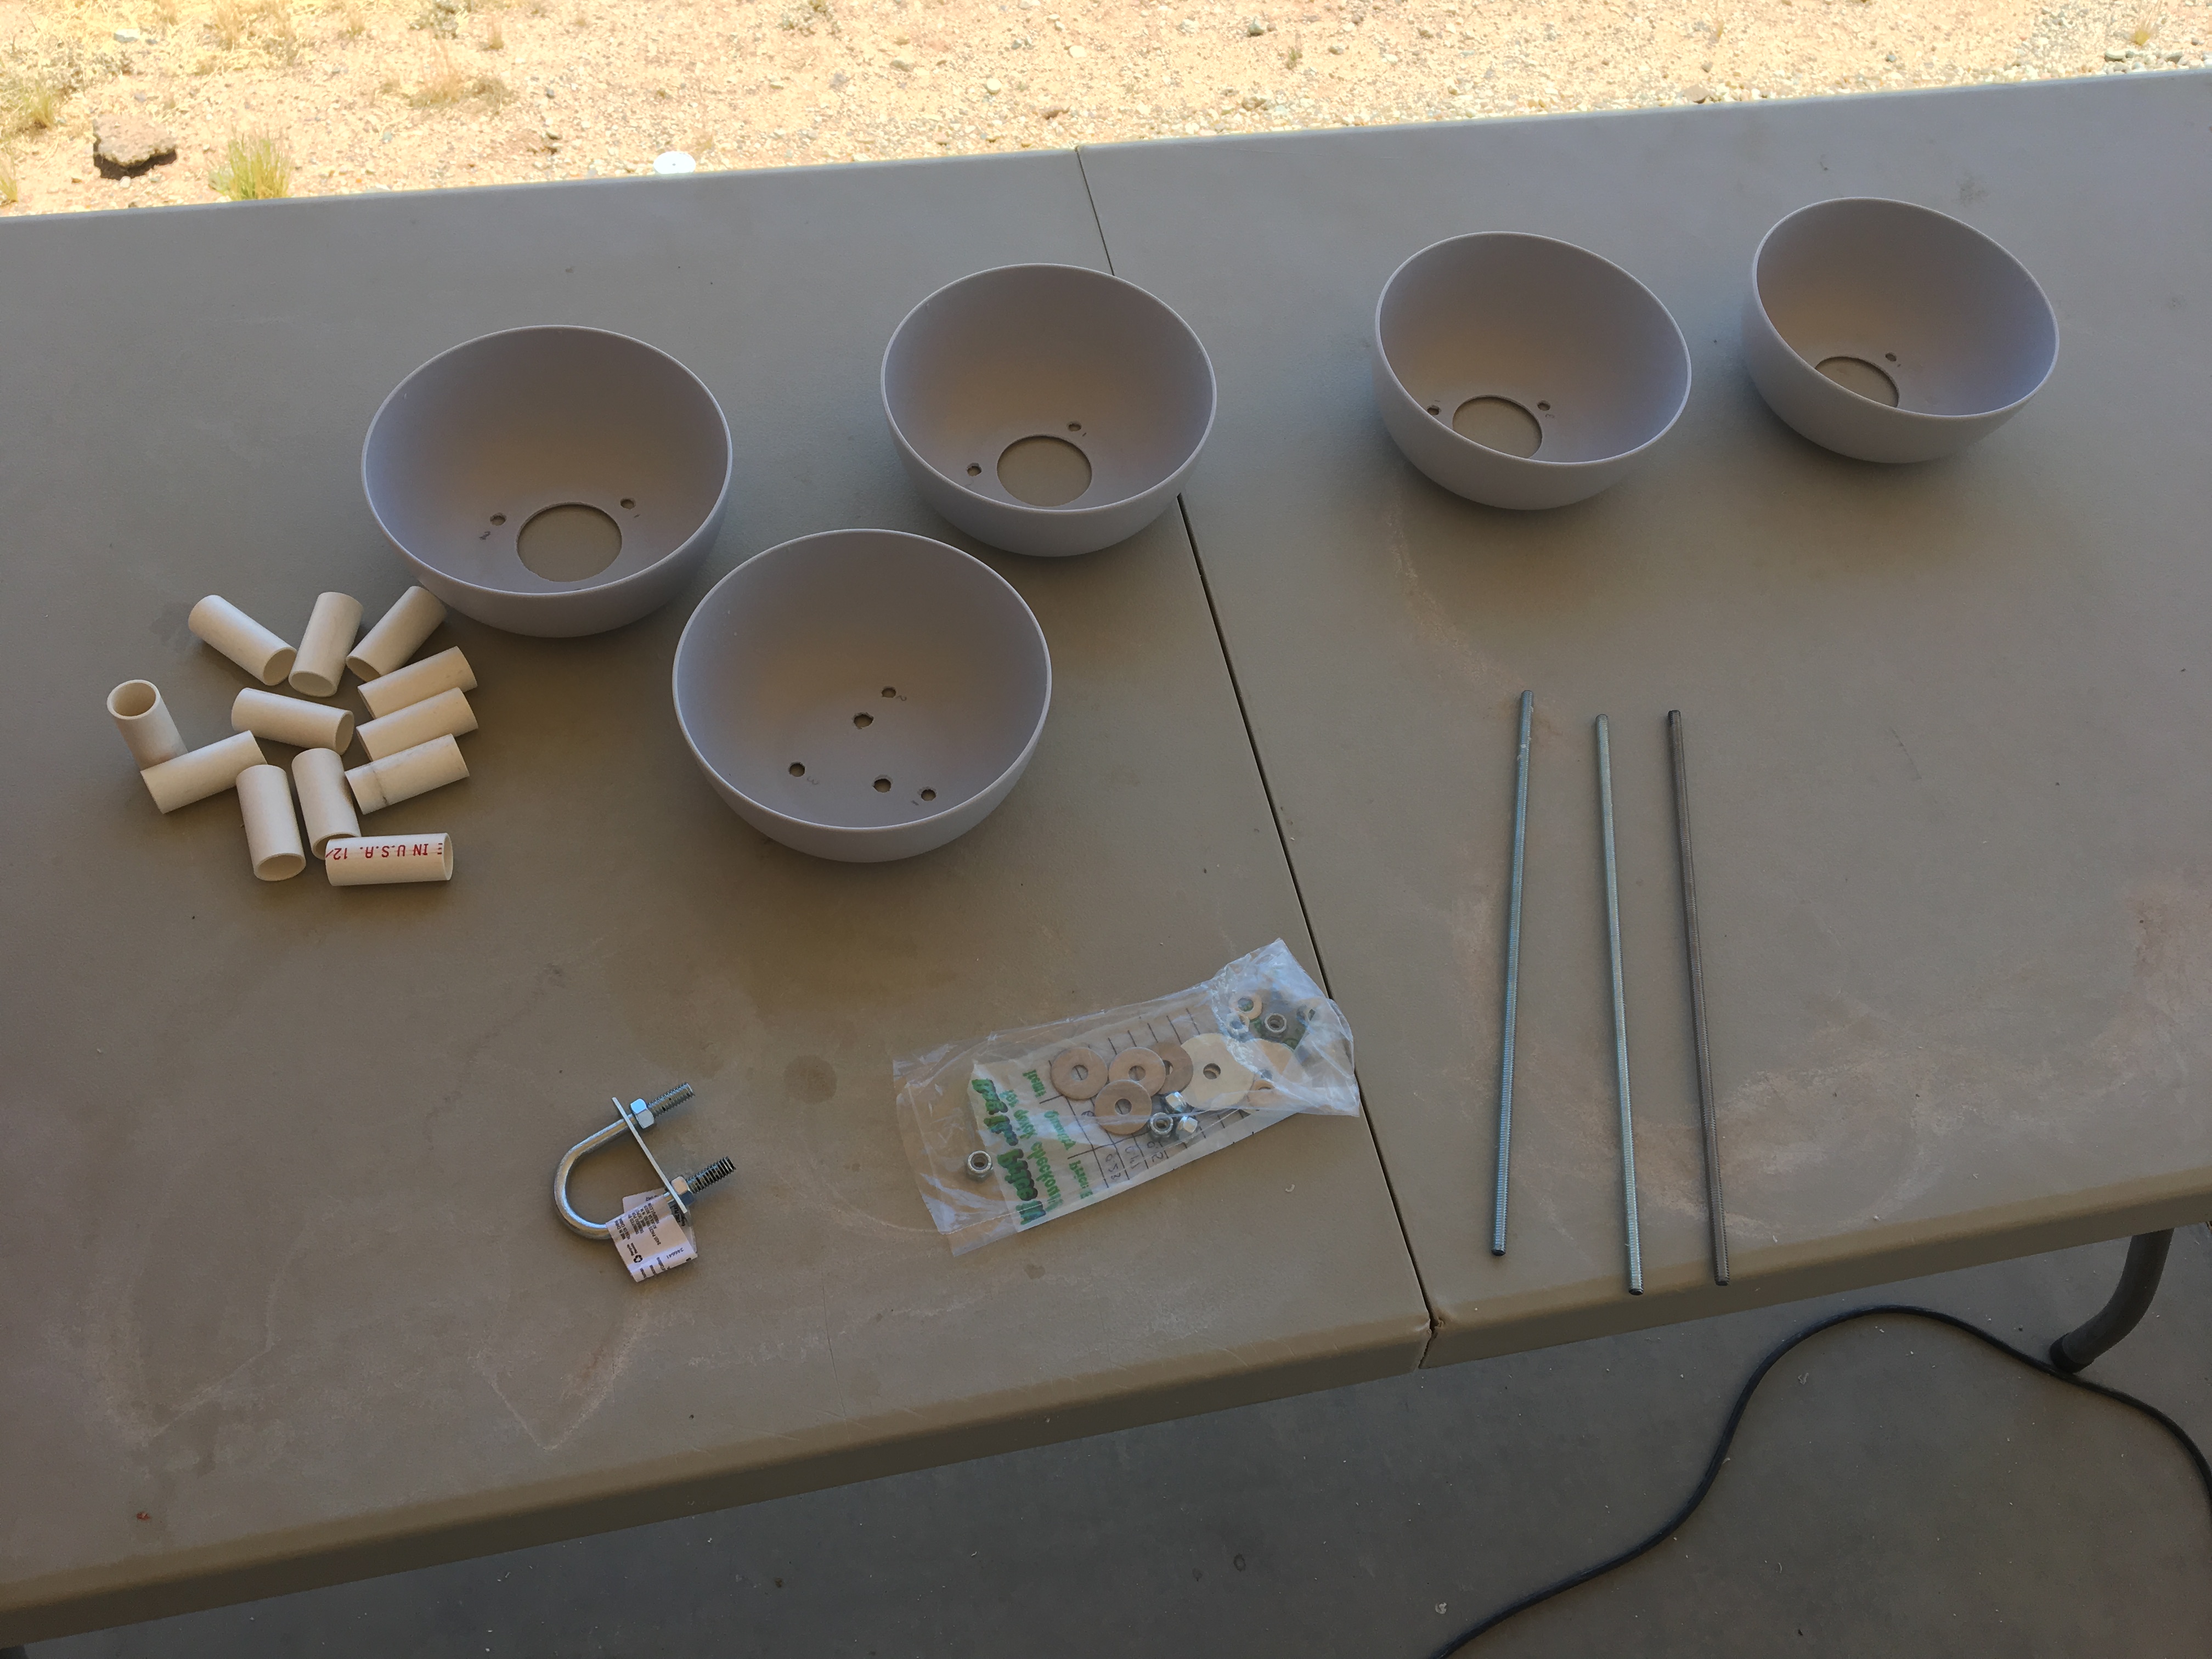
Materials List for a DIY Solar Radiation Shield
- 5 or 6 white or light gray plastic bowls or plates. Get the cheap ones from your local dollar store. I used four 79-cent bowls from Target for a total of $3.16.
- Three 1/4-20 x 12 in threaded rods. I picked them up at Home Depot for $0.98/each.
- One 1-in U-bolt. This is used for hanging the solar radiation shield from a pole or overhang. $0.95 at Home Depot.
- At least 1 meter (3 feet) of 1/2 in PVC pipe. The pipe will be cut up and used as spacers for the bowls/plates. You can get a 10 foot piece from Lowe’s or Home Depot for $2.20.
- Three 1/4-20 lock nuts. $0.15/each at Ace Hardware.
- Three 1/4-20 hex nuts. $0.12/each at Ace Hardware.
- Six 1/4 in washers. $0.17/each at Ace Hardware
Total Cost: $10.57
Procedure
Please Note that my original design used 5 cm spacers and 5 plastic bowls, which you see in the pictures, but the system was not getting enough air flow, resulting in abnormally high temperature readings. I modified the design to use 7 cm spacers and 4 plastic bowls.
Drill Holes in the Bottom of Each Bowl
1. Using a hole saw, cut holes in the center of all but one of the bowls. Those holes should be just big enough to hold your sensor(s). The sensor for my DIY weather station is small, so I used a 2 inch (50 mm) hole.
2. Drill three 1/4 inch holes in an equilateral triangle pattern around the edges. You will eventually put the threaded rods through these holes, which hold the shield together. The easiest way to ensure they line up is to stack a drilled bowl on top of an undrilled bowl and mark the hole locations with a pencil.
3. Drill 2 holes in the remaining bowl (the one you didn’t cut with the hole saw) for the U-Bolt. Center the U-Bolt so the solar radiation shield hangs evenly. Mount the U-Bolt in these holes.
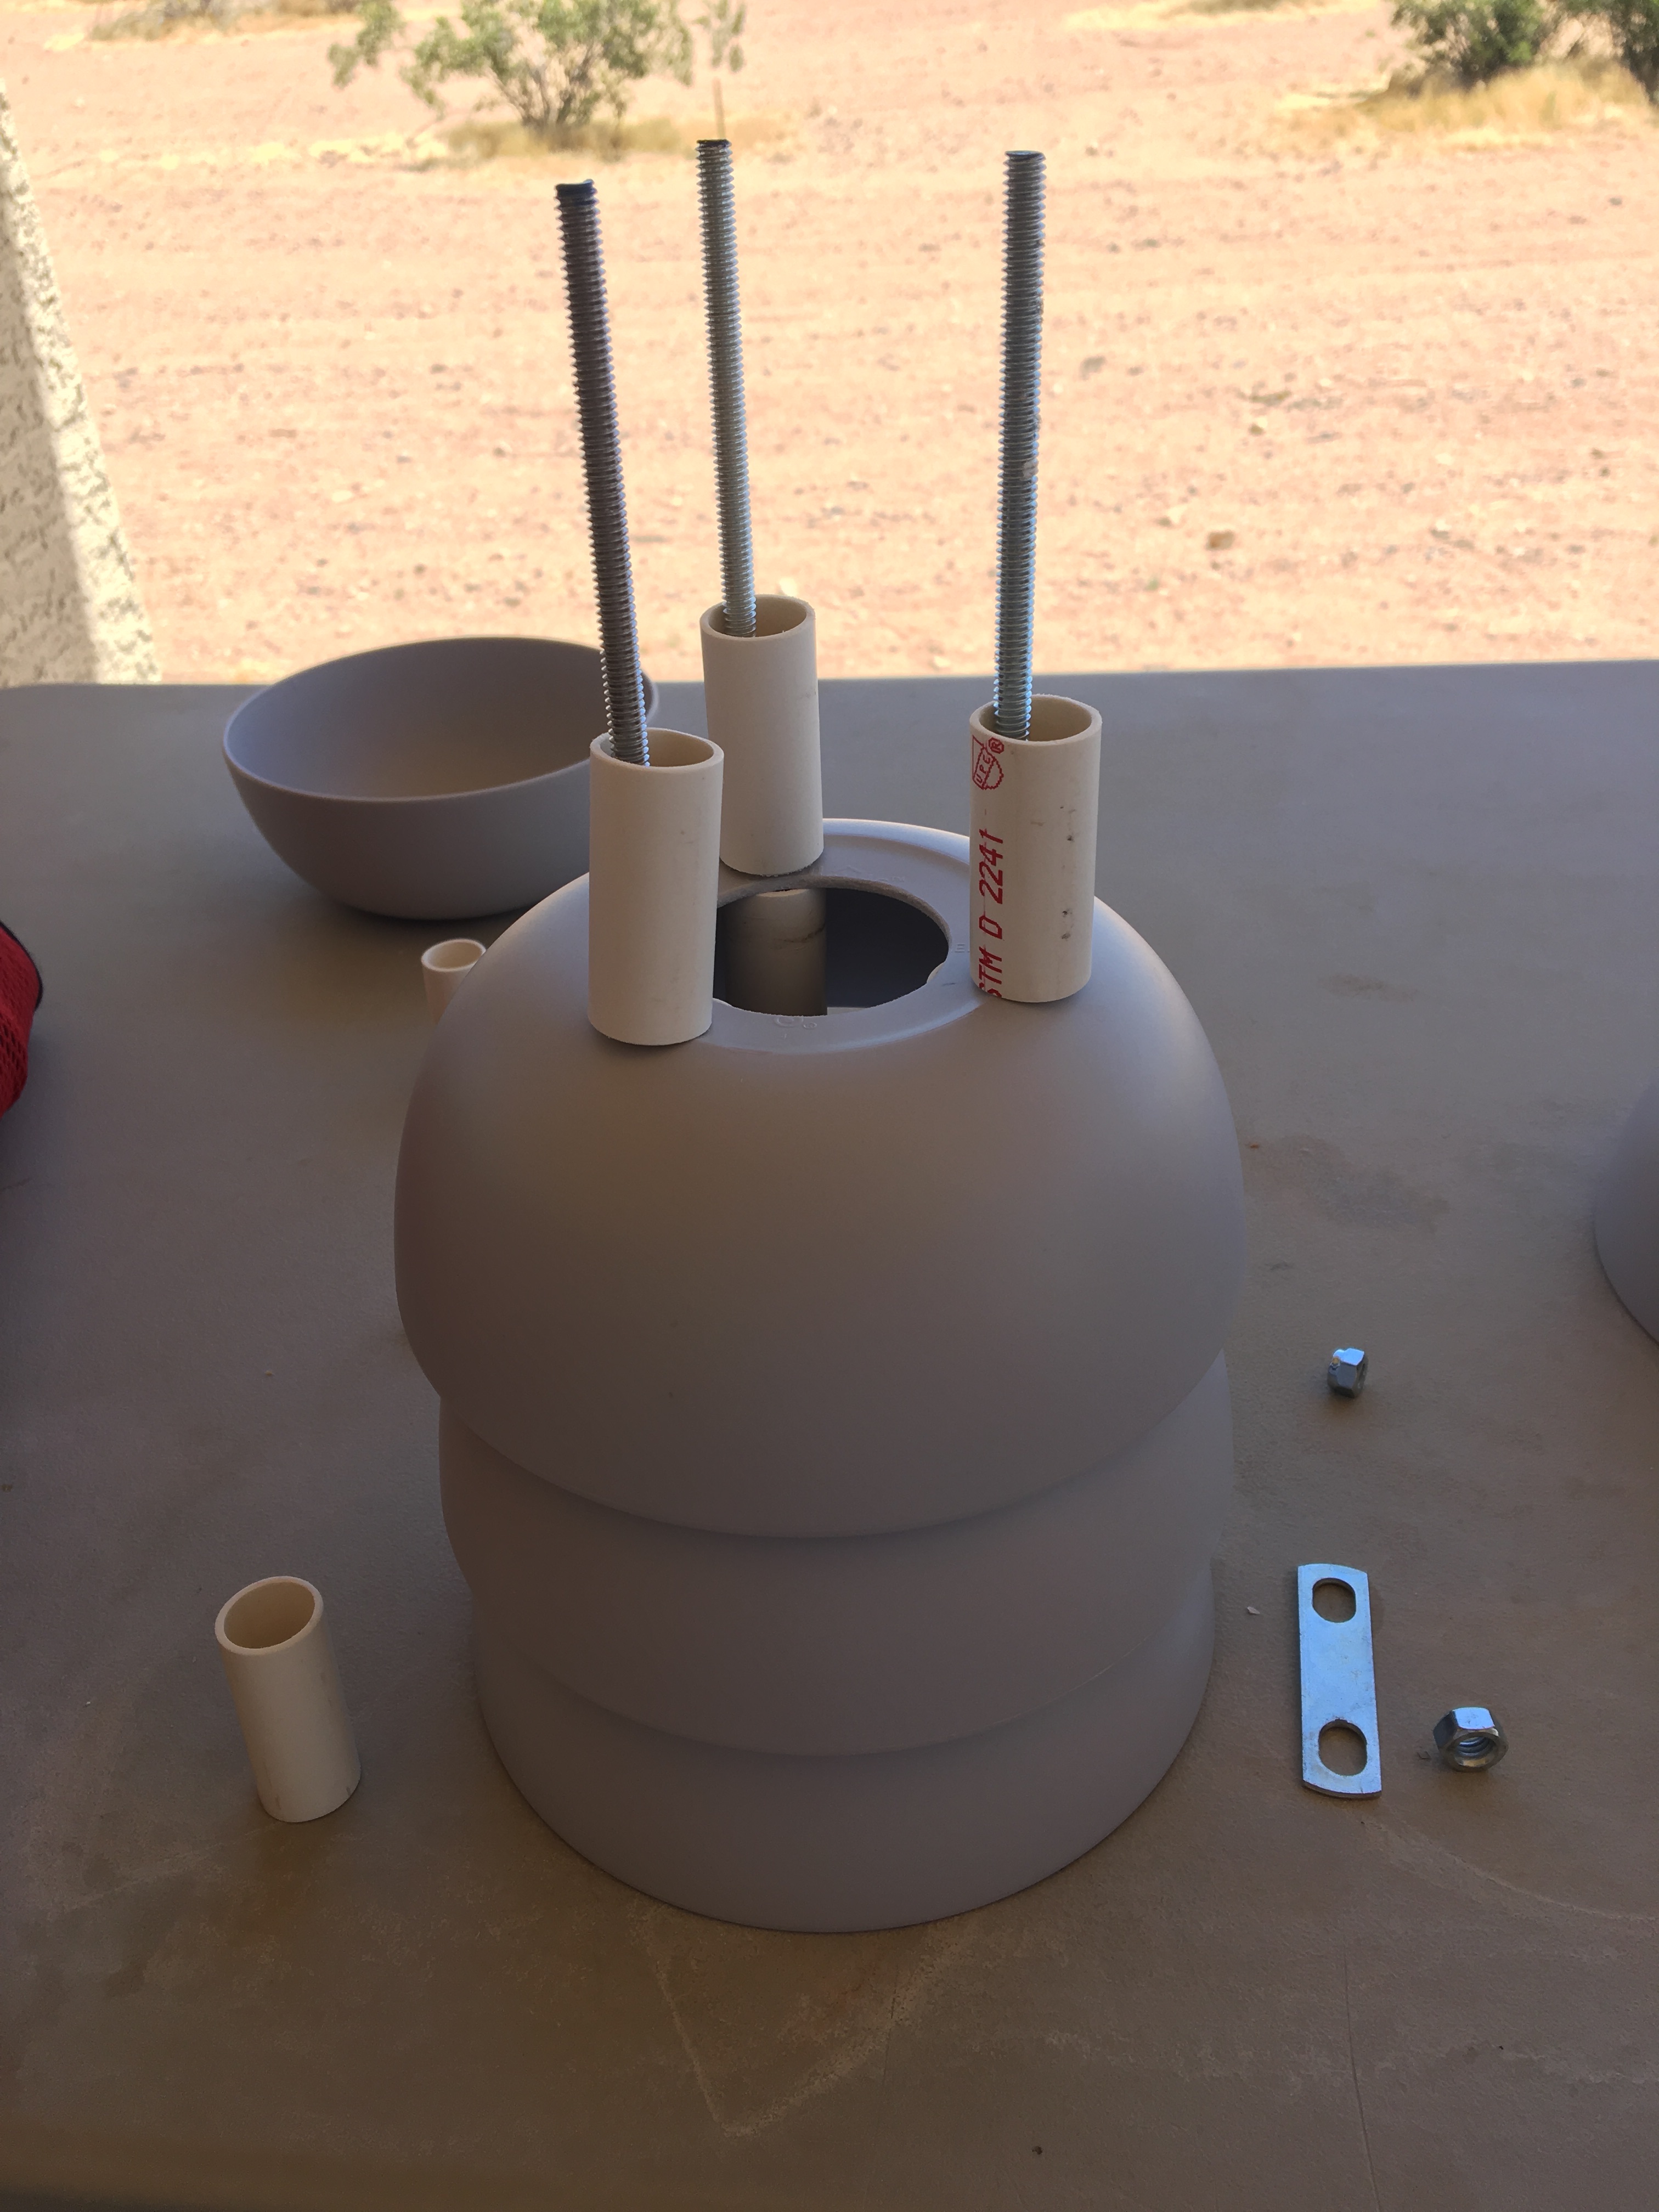
Calculate the Spacing Between Each Bowl
4. Using a saw, cut the PVC pipe into equal length sections in the length of your desired spacer (how far you want the bowls/plates apart). I cut mine into 7 cm lengths.
5. Thread a washer and one of the lock nuts about 1 inch onto the ends of each threaded rod. Make sure you thread them all on the same distance, or the solar radiation shield will not hang level.
6. Insert the three threaded rods through the holes in one of the bowls. If you’re worried about the threaded rods sticking out the top, put spacers between the lock nut and the bottom bowl. You may need a fender washer to hold the spacers in place.
Assemble Your Solar Radiation Shield
7. Put a spacer on each threaded rod, and then add the next bowl. Repeat until you’ve used all of the bowls. Make sure the bowl at the top of the solar radiation shield is the one with the U-Bolt. I recommend that you put your sensor in the shield during this assembly, as it can be difficult to mount sensors inside the shield once it’s fully assembled.
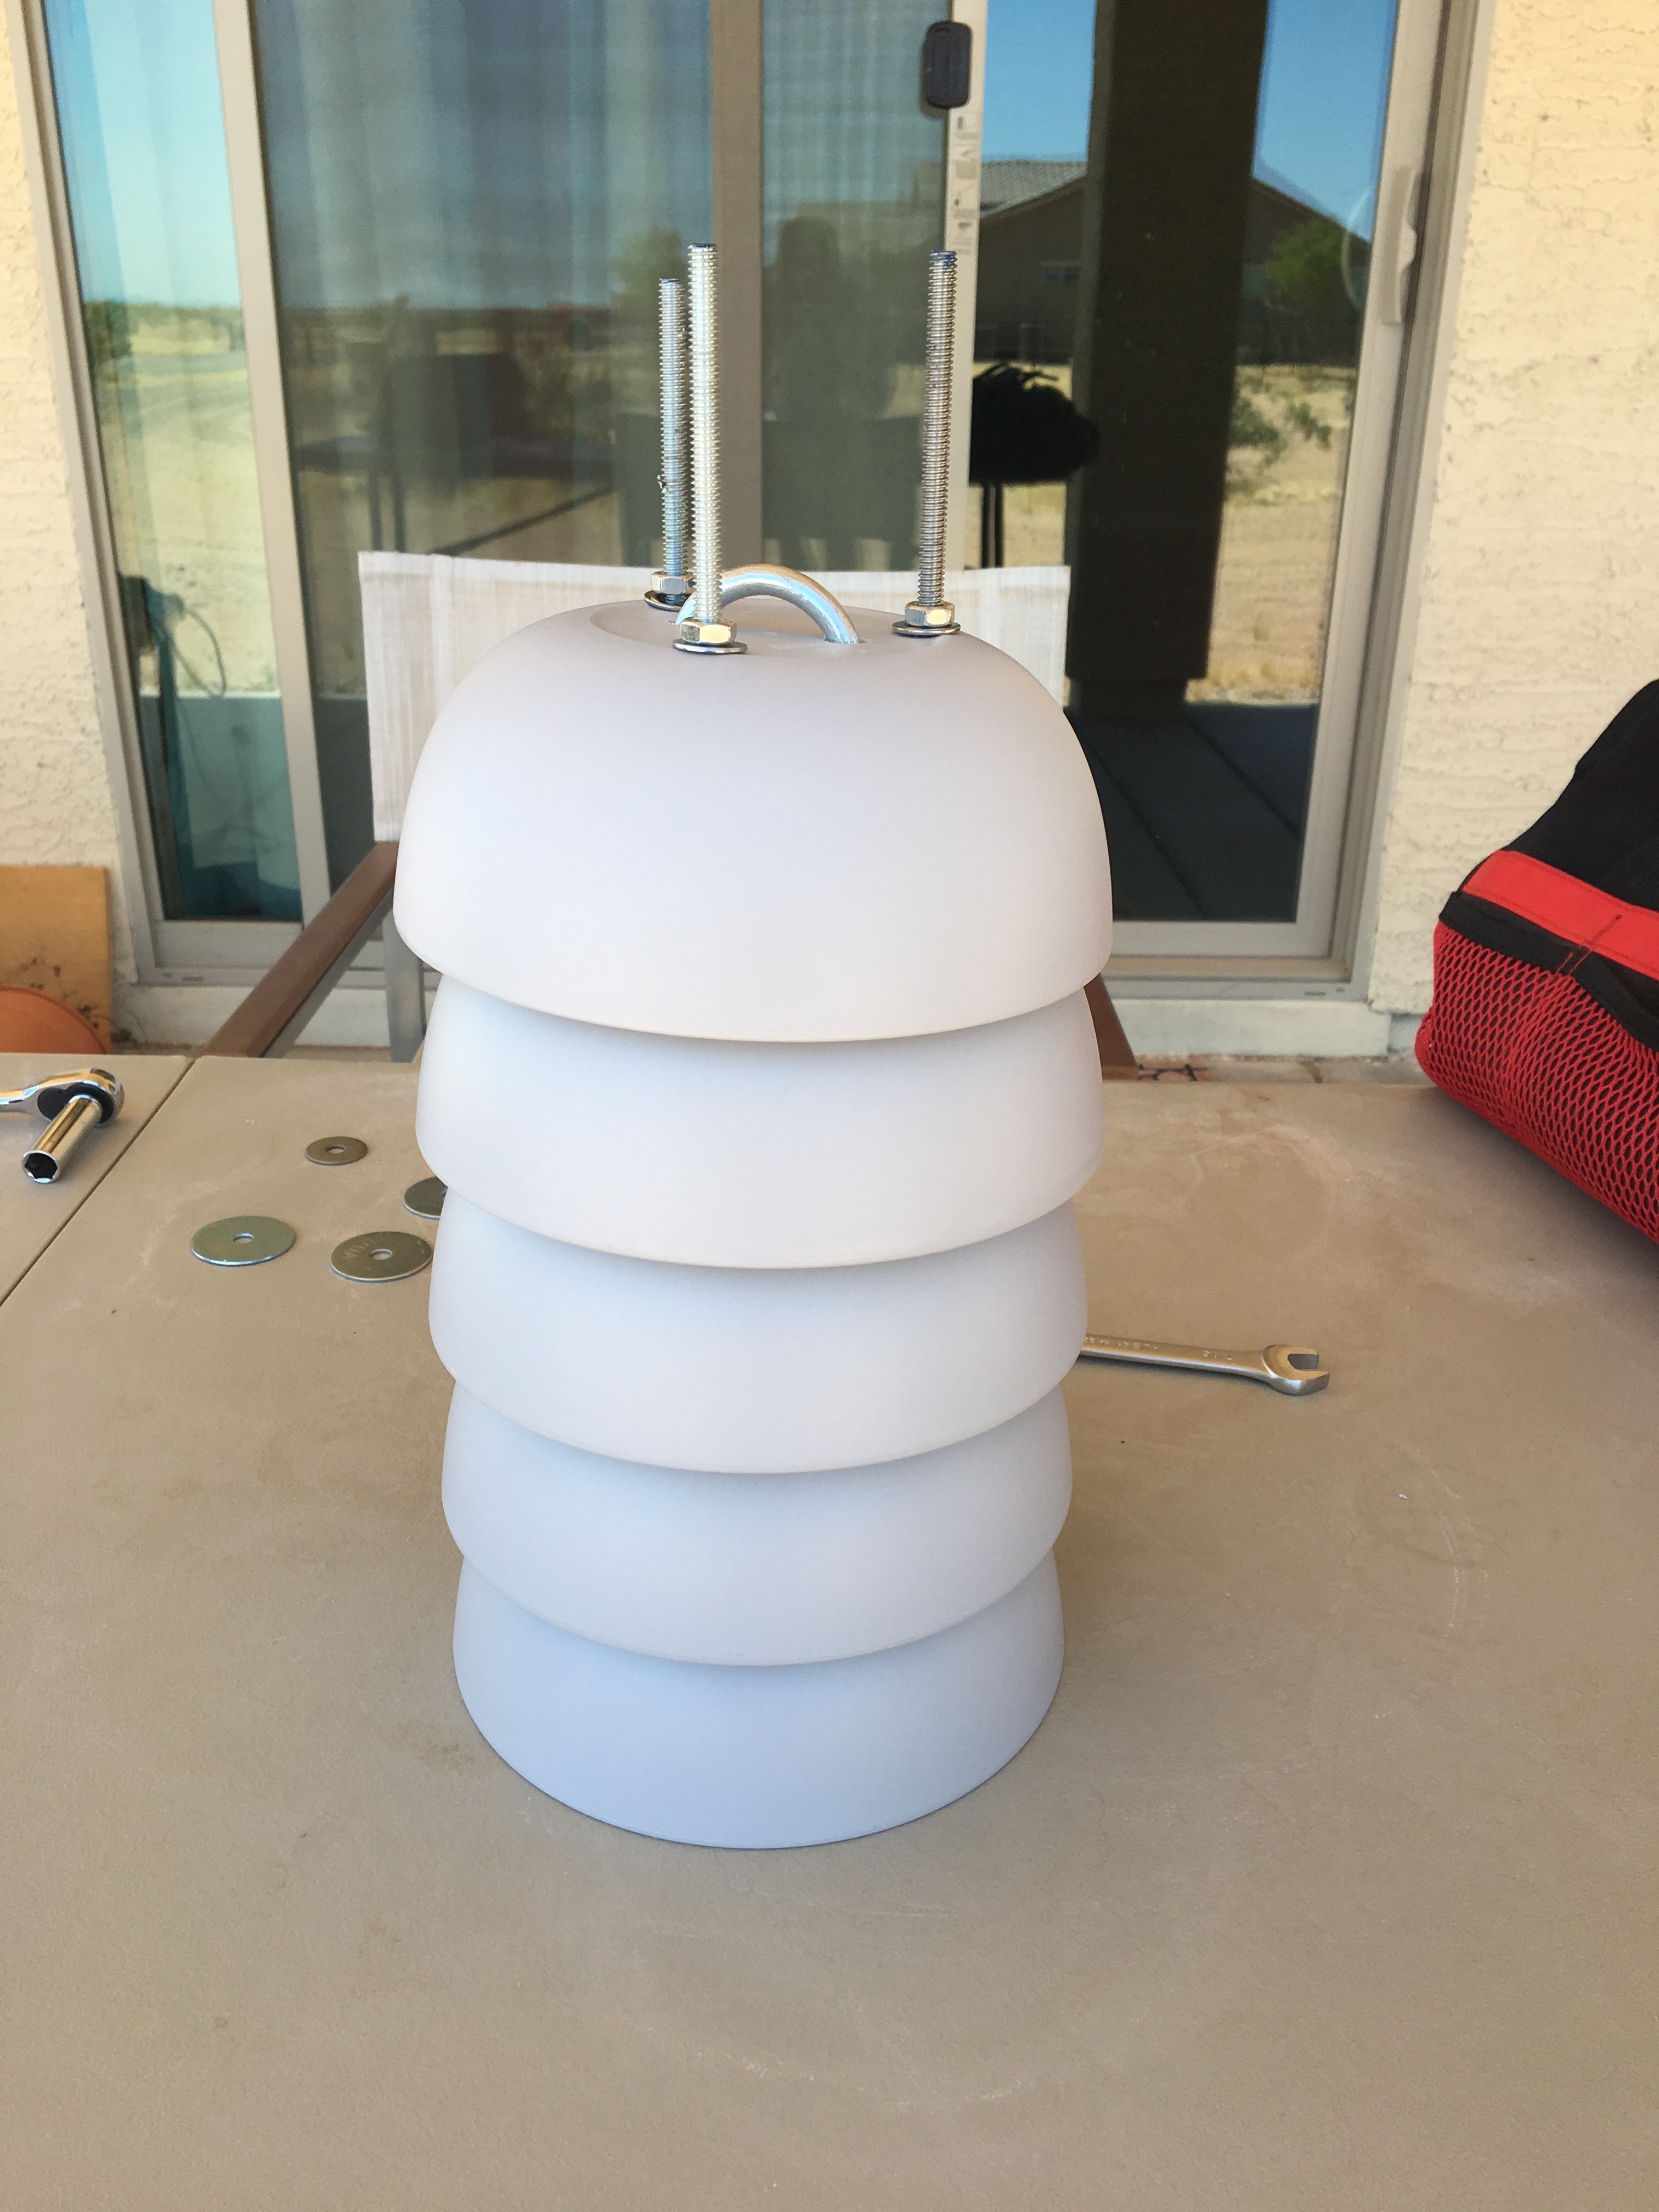
8. Once all of the bowls are in place, put a washer and a hex nut on the top of the three threaded rods and tighten the hex nut until it’s snug. Don’t tighten it too tight, as you’ll risk cracking or breaking something.
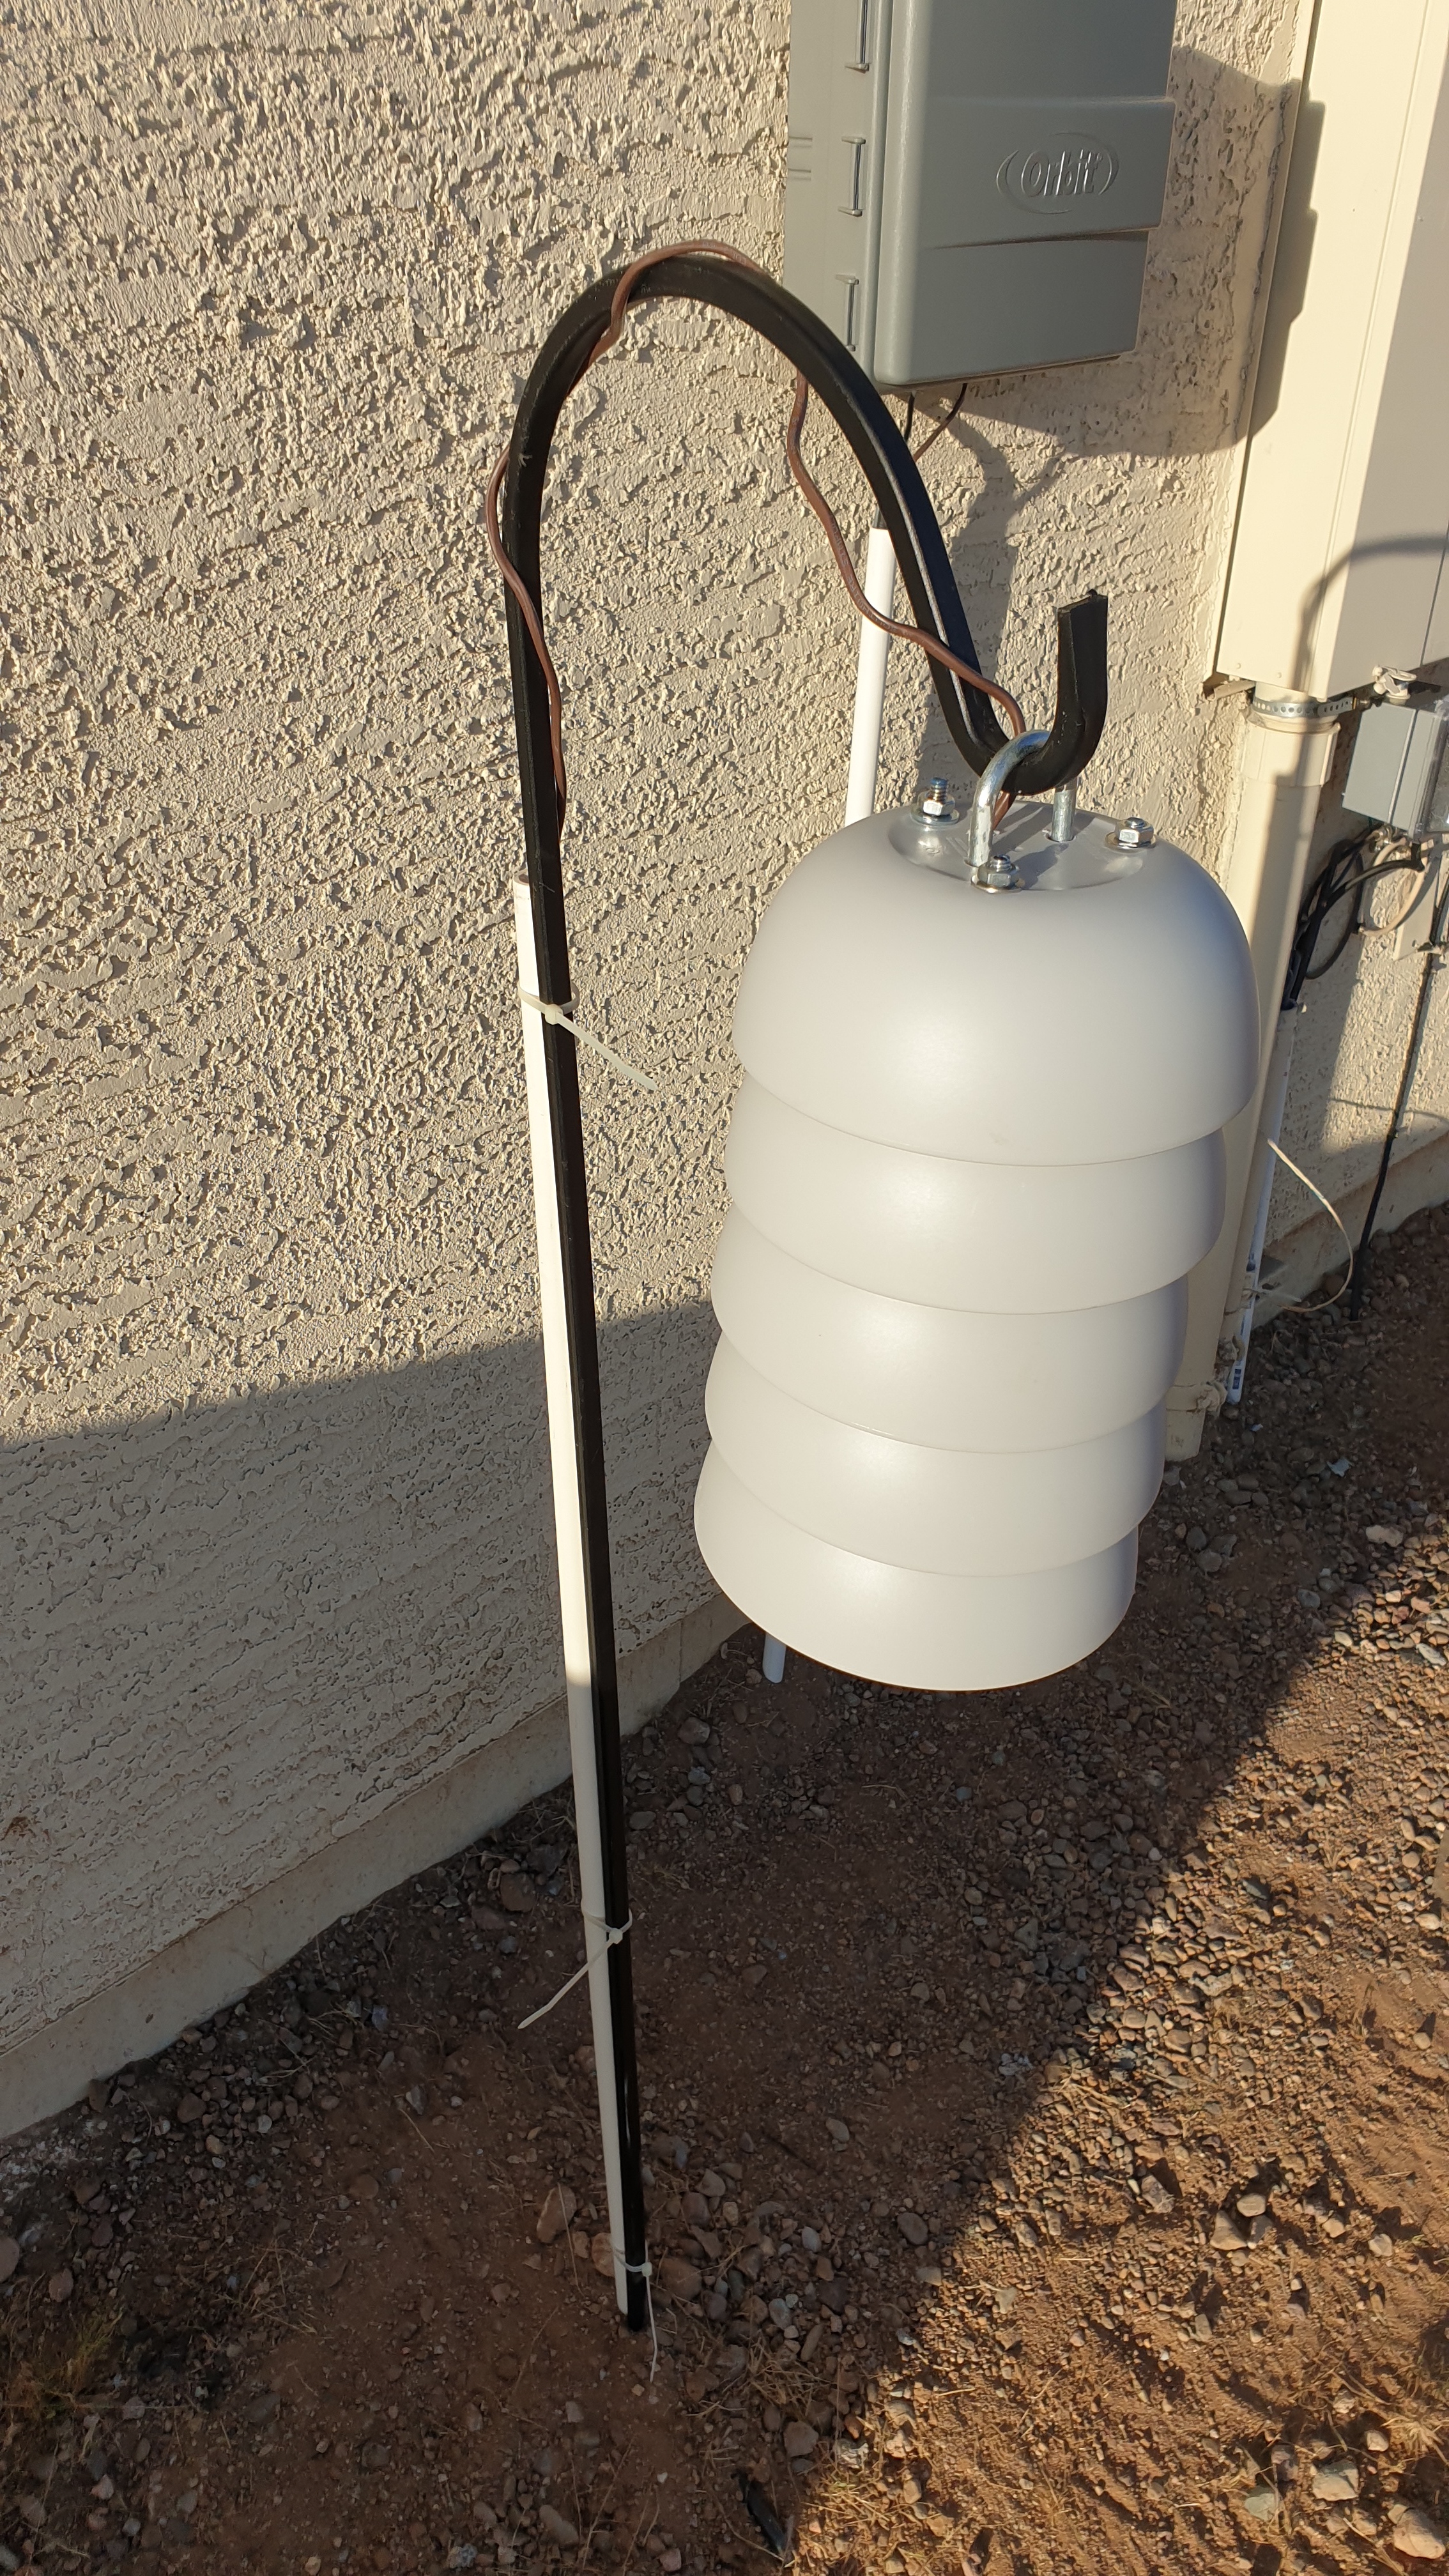
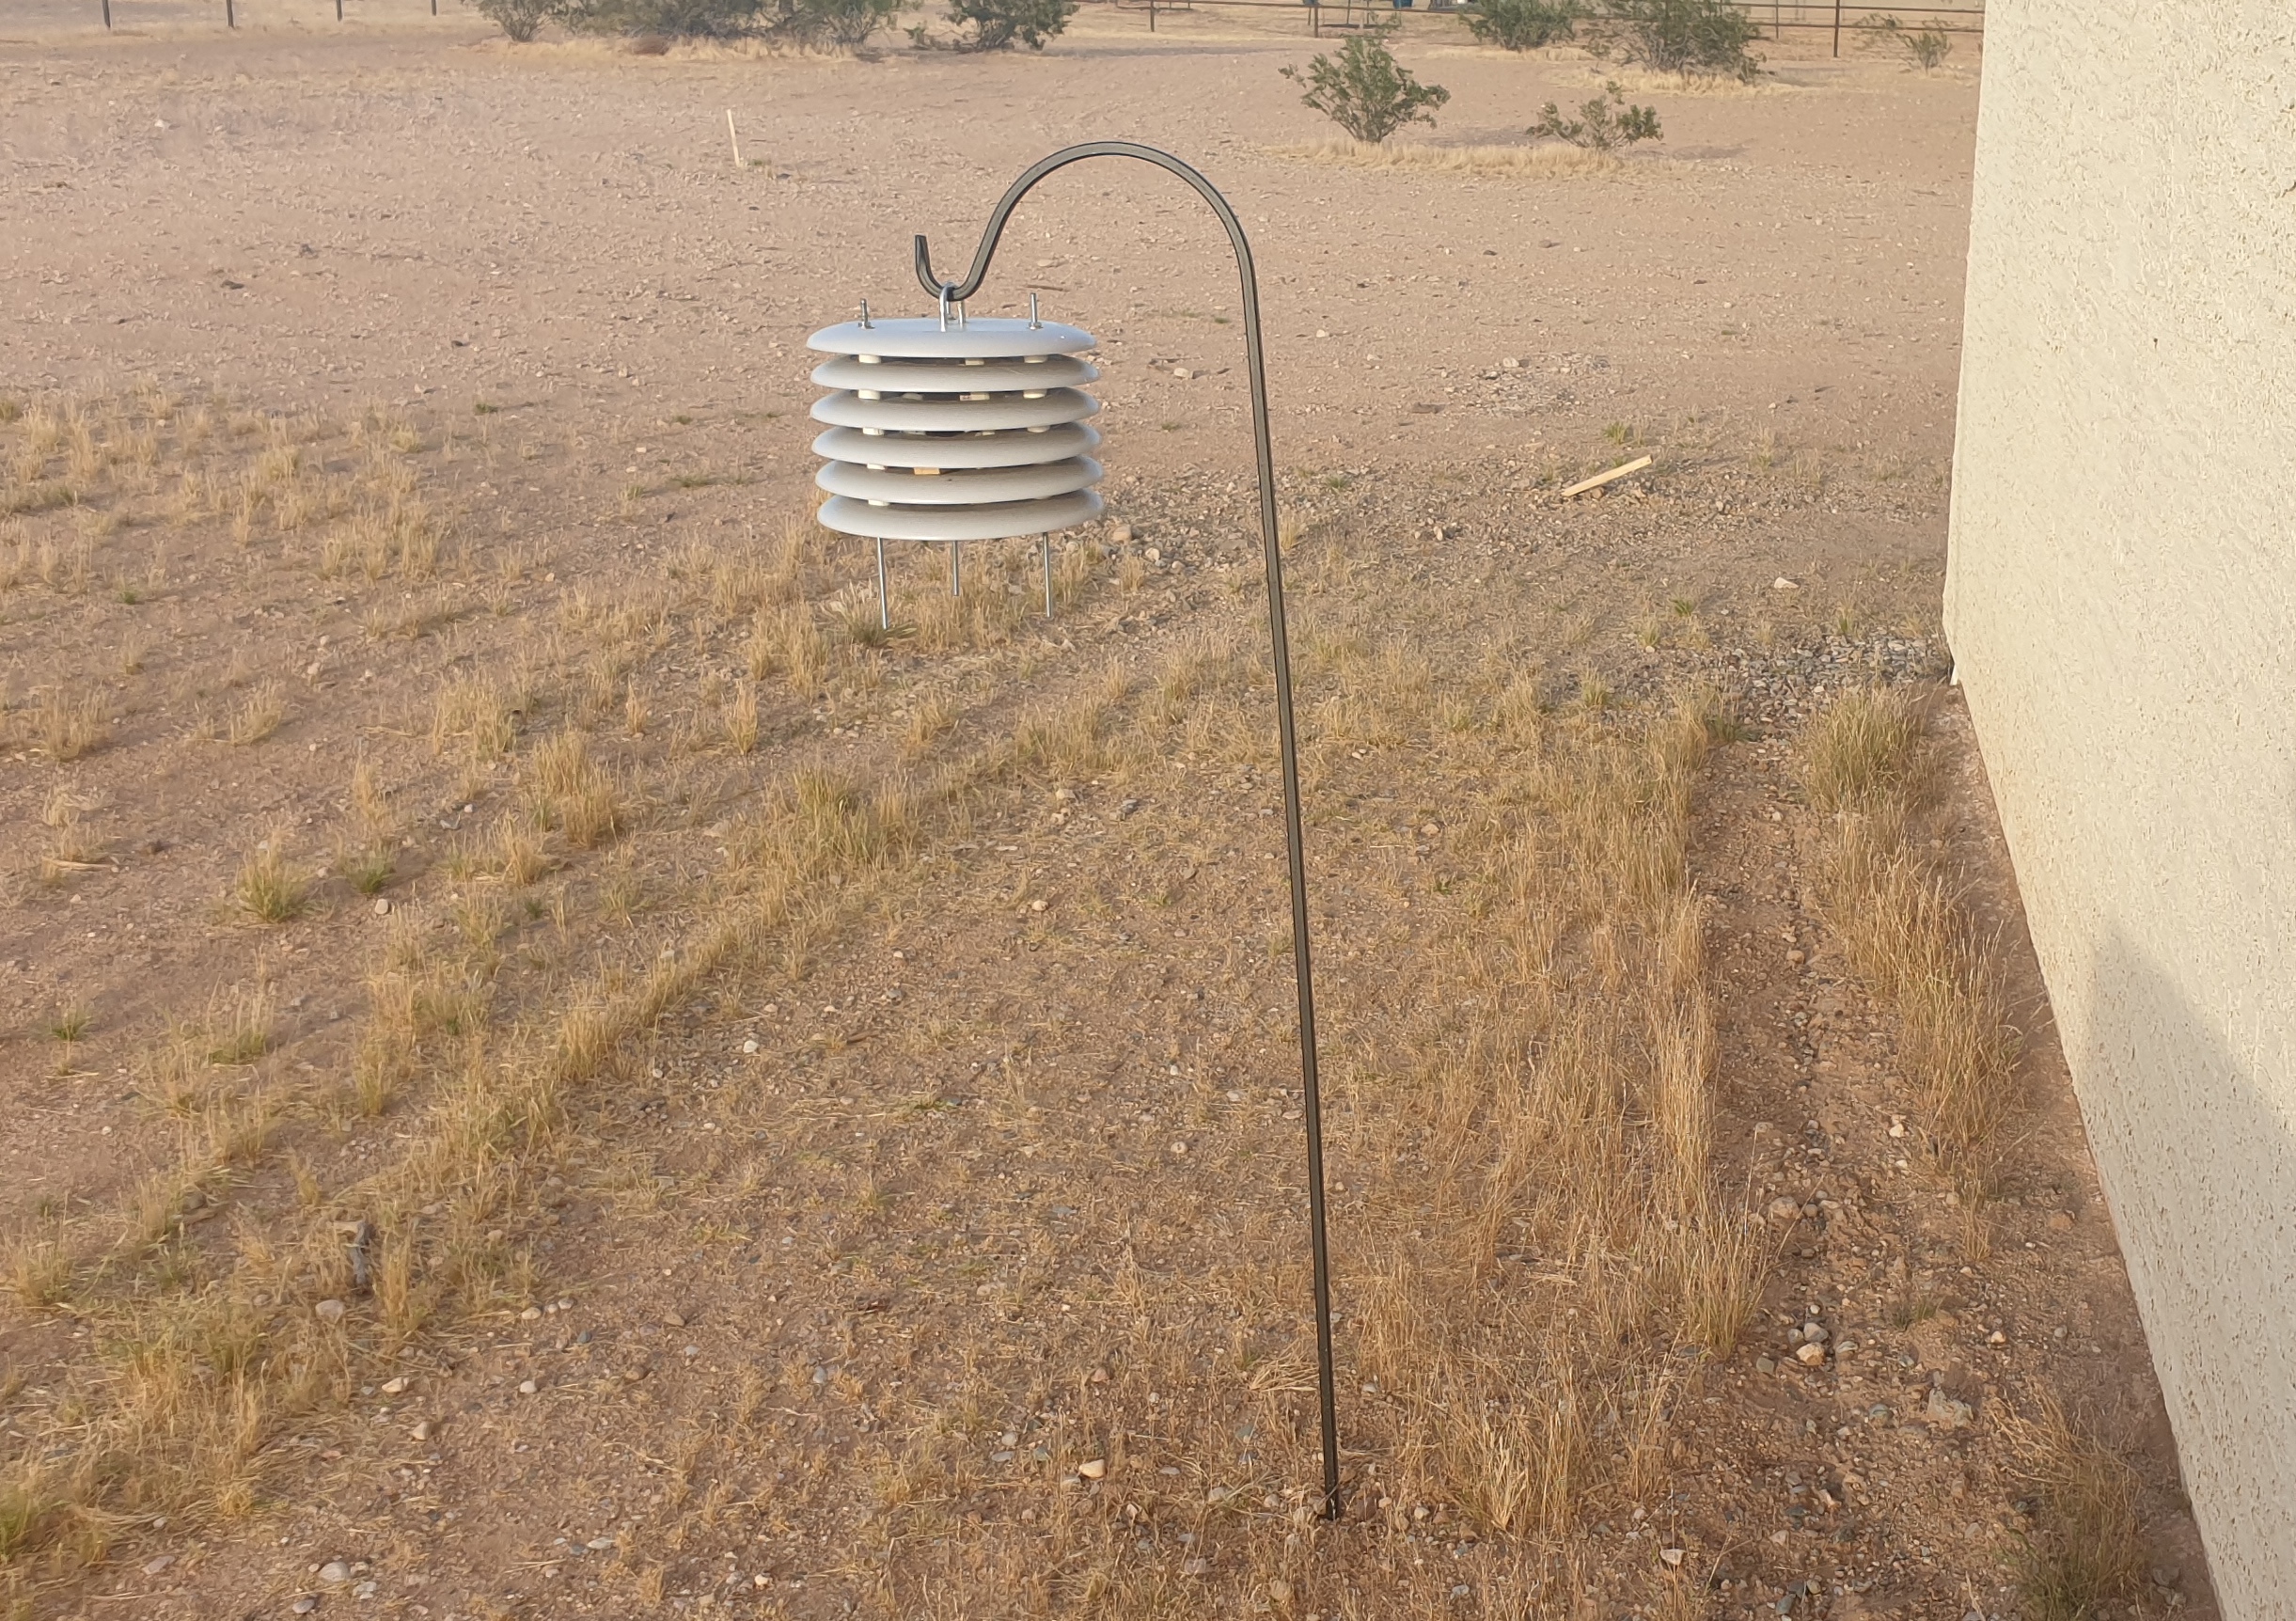
The final product should look something like this. Hang temperature sensors at a height of 1.5 meters.
And here is the one I built out of plates if you’re curious.
Stay tuned for future posts where we will be digging into how to mount and wire the sensors and data logger, as well as the results of my experiment to determine whether the plates or the bowls makes a better solar radiation shield. If you have any questions, feel free to ask in the comments section below.