Post-processing photos following a photo shoot is a fun and enjoyable process. It’s actually one of my favorite parts of my entire photography workflow. Unfortunately, the process can become tedious and time-consuming, costing you both time and money. Today, you’re going to learn about the Python Pillow library. It’s a somewhat obscure intersection where Python and photography meet. Let’s automate those tedious and time-consuming tasks so you can generate more billable hours and boost your income.
The Python Imaging Library, or PIL, is a powerful, free, and open-source imaging library. The original PIL library was retired in 2009 and has since been replaced with a new library called Pillow, which has full support for Python 3.
Python Pillow automation is not intended to replace your workflow in a professional editor such as Adobe Lightroom. Instead, Pillow should work in conjunction with those programs to enhance and maximize the efficiency of your workflow so you can focus on more important tasks.
Why Automate Your Workflow?
Many photographers work as freelancers, independent contractors, or are self-employed. In such capacities, we have so much more to do than just working for our clients. We need to do accounting, marketing, networking, and much more. Many of those hours are non-billable.
Automating your workflow means that you can spend more time pitching clients, going on photo shoots, and taking on more work. You’ll free up time to focus on billable tasks. You’ll reap so many benefits from investing in automation, such as:
- Save Time
- Make More Money
- Eliminate repetitive tasks
- Focus on your most important tasks
- Be Happier
Best of all, you can completely customize your automation to fit your workflow. Lightroom and Photoshop give you plenty of freedom, but it’s not limitless. Python automation, including Pillow, is.
Tools to Get Started with Python and Pillow
It’s so easy to get started. Python is not dependent on any operating system, so it will run on just about any device.
- Python 3 comes pre-installed on most computers, but if it’s not yours, you can download it here. It’s an easy programming language to learn because it’s designed so non-programmers can read and understand its code.
- You’ll also need to install Python’s package installer, pip.
- A Command Line Tool such as Terminal, Command Prompt, or Windows PowerShell.
- A Text Editor to edit your Python code. An integrated development environment (IDE) such as Visual Studio Code is best for editing code, but NotePad or TextEdit will work fine.
Installing the Python Pillow Image Processing Library
Once you have pip up and running, open up your command line tool. It takes one simple command to install the Pillow library using pip.
pip3 install pillowYou can also install Pillow with Anaconda.
conda install pillowPython Pillow Basics: Open, Display, and Close an Image
To do anything with Pillow, we first need to open the image file and read it into our Python script using Pillow’s Image module. Before we can use the Image module, we need to import it into the Python script. At the top of your script, add the following line.
from PIL import ImageWe’ll open, display, and close our image with the Image module’s open(), show(), and close() methods. When the show() method is called, the script will pause until the user clicks the “x” in the corner to close the image.
#!/usr/bin/env python3
from PIL import Image

my_picture = Image.open("picture-1.jpg")
my_picture.show()
my_picture.close()
Read Image Attributes
You can easily access all kinds of information about an image using Pillow. A few examples include:
- File Name
- Image Format
- Size and Dimensions
- Color Info
- Camera Data
Compliment Pillow with built-in Python tools to easily perform calculations or export this data to any number of formats, such as a text file, spreadsheet, JSON, HTML table, and much more. Can you start to see how powerful automation can be?
Let’s look at another simple example. We’ll open up our image and print its format, dimension, and aspect ratio to the Terminal window.
#!/usr/bin/env python3
from PIL import Image

my_picture = Image.open("picture-1.jpg")
aspect_ratio = my_picture.width / my_picture.height

print(my_picture.format)
print(my_picture.width, my_picture.height)
print(aspect_ratio)
my_picture.close()
This code will output:
JPEG
1920 1080
1.7777777777777777
Now that we have the basics down, let’s dive into some actual automation.
Convert from One Image Type to Another
While most people don’t blink at having to reformat an image or two, the process becomes exponentially tedious once you scale it up. Or even worse, what if your images are scattered across many directories? Thankfully, converting images from one format to another is one of the easiest forms of automation. With Pillow, it’s just a few simple lines of Python code.
#!/usr/bin/env python3
from PIL import Image

my_picture = Image.open("picture-1.jpg")
my_picture = Image.save("picture-1.png")
my_picture.close()
In the real world, it’s highly unlikely that you’ll be using Python to reformat just a single image. Instead, let’s scale this up and look at a folder of jpg images we want to convert to png.
We’ll use Python’s os module to interact with the files in the operating system. More specifically, the os.listdir() method lists the images in our directory. Then apply our algorithm to change their format one by one. The best tool to iterate through each image is Python’s for loop.
#!/usr/bin/env python3
from PIL import Image
import os

# Get the path to the current folder
current_folder = os.getcwd()

# Use os to generate and sort list of image file names
image_files = os.listdir(current_folder)

# Loop through the images
for jpg_filename in image_files:
    # If not a jpg, skip it
    if not jpg_filename.endswith(".jpg"):
        continue

    # Generate the name of the .png file
    png_filename = jpg_filename.replace(".jpg", ".png")

    # Open the .jpg file
    jpg_image = Image.open(jpg_filename)

    # Save the .jpg image as a .png
    Image.save(png_filename)

    # Close the image
    jpg_image.close()
Rename an Image
Have you ever had to bulk rename a lot of images, or any type of file for that matter? There are tools out there to do that, but you often have to manually go through run the tool in each folder. It’s still a tedious process at best. With Python and Pillow, you just have to run it once and it’s done. It doesn’t matter if you have one photo or a million.
Take my Matt Gove Photo website for example. The photo albums alone consist of over 70,000 image files spread across 200-plus albums and nearly 500 directories. Can you imagine how long it would take me to perform any iterative task on all of those files if I didn’t have a tool that I could just hit “go” once and it would do it all for me?
In fact, I recently needed to generate bigger thumbnails for every single image in the Matt Gove Photo website. Using Pillow, I was able to write a script and generate new thumbnails for all of the tens of thousands of image files in less than 15 minutes. What would you do with all that time you saved?
Renaming images with Pillow is so easy. In this example, we have a folder with photos in it. They are called “picture-1.jpg”, “picture-2.jpg”, and so on. We’ve decided that instead of calling these images “picture-x.jpg”, we want to call them “photo-x.jpg”.
Like the previous example, we’ll use Python’s os module to list the files in our folder and a for loop to loop through each file.
#!/usr/bin/env python3
from PIL import Image
import os

# Get the path to the current folder
current_folder = os.getcwd()

# Use os to generate and sort list of image file names
image_files = os.listdir(current_folder)
image_files.sort()

# Initialize a counter to name our photos
counter = 1

# Loop through the images
for img_filename in image_files:
    # If not a jpg, skip it
    if not img_filename.endswith(".jpg"):
        continue

    # Open the image
    img = Image.open(img_filename)

    # Save the image
    output_filename = "photo-{}.jpg".format(counter)
    img.save(output_filename)

    # Increment the counter by 1
    counter += 1
Do you know what the most powerful aspect of this code is? It doesn’t matter how many images you have in the folder. It will still work.
Let’s dive in and get our hands dirty working with some images.
Rotate or Flip an Image
Rotating an image is one of the most common post-processing tools photographers use. Easily straighten a crooked horizon or switch your photo between portrait and landscape mode. With Python Pillow, you can easily rotate or flip your images with the rotate() or transpose() methods, respectively.
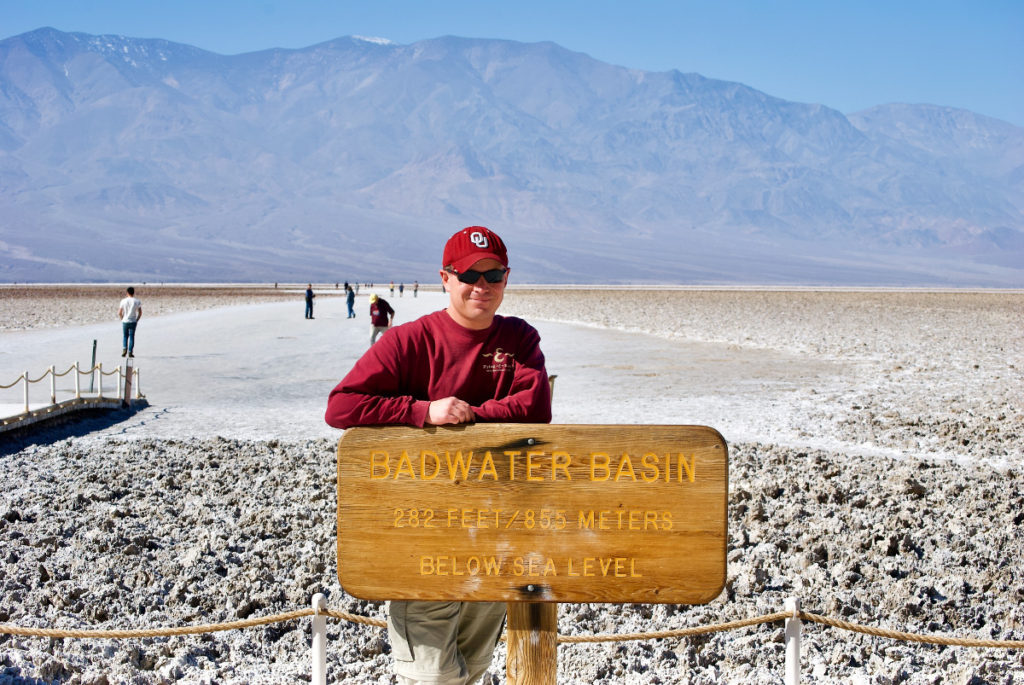
We’ll use a picture of me at the Badwater Basin in Death Valley National Park, California. The picture was taken prior to COVID-19. Sitting at 282 feet (86 meters) below sea level, Badwater Basin is the lowest point in North America. I chose this image because there is text on the sign so you can easily see the effects of each method.
To rotate the image, simply pass the rotate() method the number of degrees you wish to rotate the image counter-clockwise. If you want to rotate the image clockwise, pass it a negative number. Let’s rotate the image 45 degrees.
#!/usr/bin/env python3
from PIL import Image

img = Image.open("badwater-basin.jpeg")
rotated_img = img.rotate(45)
rotated_img.save("badwater-basin-rotated45.jpg")
This script outputs the following image.
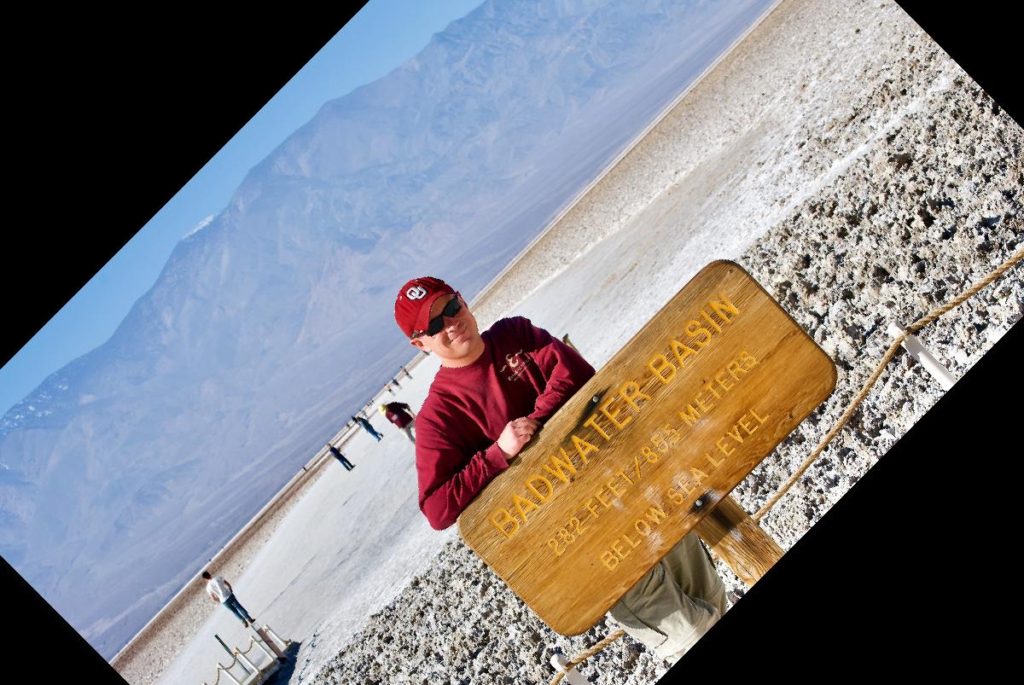
rotate() MethodUnfortunately, we have a problem here. When you rotate an image to straighten a horizon, your photo post-processing program crops the rotated image to remove the black triangles from the corners. Fear not, Python will do that, too. We’ll cover cropping with Pillow shortly.
Flipping an image is easy to do with Pillow’s transpose() method. We’ll need to hand it one of the following parameters.
Image.FLIP_LEFT_RIGHTwill mirror the imageImage.FLIP_TOP_BOTTOMwill turn the image upside down.
Let’s up our Python game a bit and use Pillow to create an upside down mirrored version of the original Badwater Basin image.
#!/usr/bin/env python3
from PIL import Image

img = Image.open("badwater-basin.jpeg")
flipped_img = img.transpose(Image.FLIP_LEFT_RIGHT)
flipped_img = img.transpose(Image.FLIP_TOP_BOTTOM)
flipped_img.save("badwater-basin-flipped.jpg")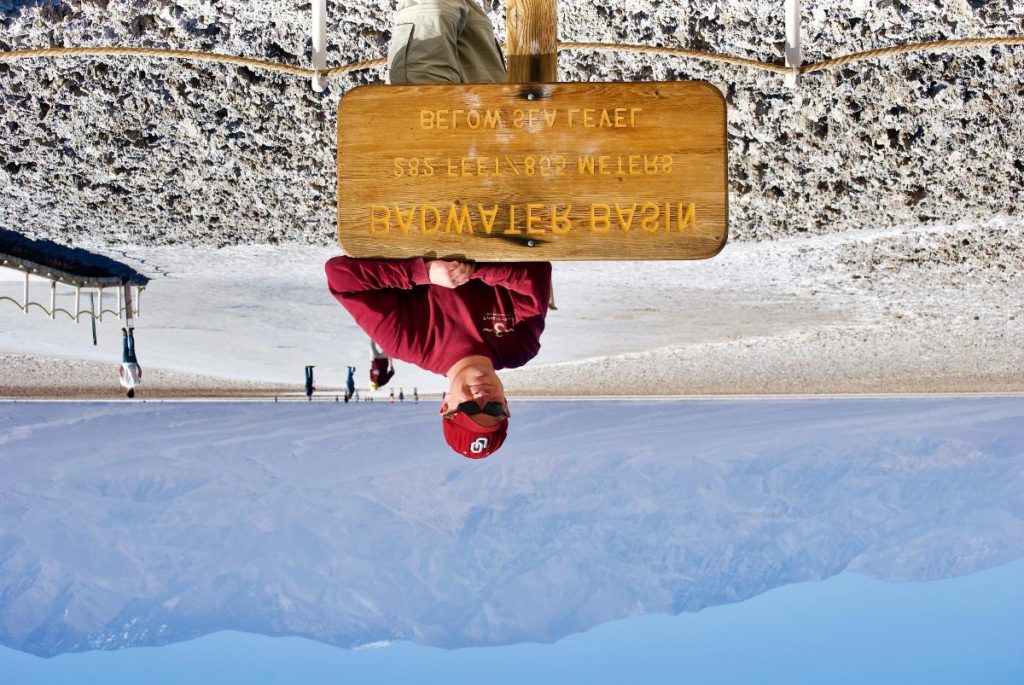
transpose() MethodScale or Resize an Image
One of the challenges of running a photography website is trying to find the balance between high-quality images and fast load times. If you just post all of your full size images, nobody will wait that long for the page to load and you’ll lose your audience. On the flip side, the same thing will happen if you post low quality images, regardless of how fast the page loads.
The secret to optimizing load times while maintaining high-quality images is to use thumbnails. Unfortunately, this adds another layer of complexity in your workflow and requires you to generate 2 versions of each image. Even using a program like Lightroom, the process can be tedious, especially once scaled up.
Once again, Python automation with Pillow comes to the rescue. All you need to do is output the full-size images from your photo editing software and let Pillow do the rest. Even better, you have so much flexibility to define how you want to scale your images.
- Use a scaling factor
- Scale to a set width or height
- Custom dimensions
We pass the scaled height and width to Pillow’s resize() method with a tuple. A tuple is a fixed set of numbers that is enclosed in parentheses. While you can change the values of each element in the tuple, you cannot add or remove elements from it. The resize() method expects a tuple in the format (width, height), in units of pixels. Let’s scale our image to 30% of its original size.
#!/usr/bin/env python3
from PIL import Image

img = Image.open("badwater-basin.jpeg")
scaling_factor = 0.3
scaled_width = round(img.width * scaling_factor)
scaled_height = round(img.height * scaling_factor)
resized_img = img.resize((scaled_width, scaled_height))
resized_img.save("badwater-basin-resized.jpg")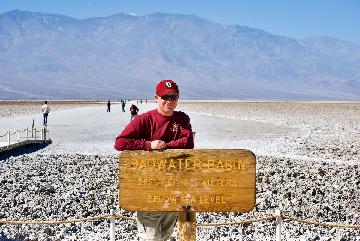
Shortcut to Create Thumbnails
If you’re generating thumbnails or need to scale all of your images to the same width or height, I highly recommend that you give Pillow’s thumbnail() method a try. Like the resize() method, it gets passed a (width, height) tuple.
The height and width passed to thumbnail() are handled a bit differently than they are in resize(). Indeed, they define the maximum height and width your thumbnails should be. Your images will maintain their aspect ratio as they are scaled. You don’t need to figure out the math yourself. Let’s create some thumbnails.
- Landscape thumbnails should be 200 pixels wide
- Portrait thumbnails should be 150 pixels tall
Because our photo is in landscape oriented, it will be 200 pixels wide. Pillow will automatically scale the height of the image to maintain its aspect ratio.
#!/usr/bin/env python3
from PIL import Image

img = Image.open("badwater-basin.jpeg")
max_dimensions = (200, 150)
img.thumbnail(max_dimensions)
img.save("badwater-basin-thumbnail.jpg")
Tip: If you want to maintain the aspect ratio of your photo as you scale, I recommend using thumbnail() regardless of the size you’re scaling to. Just because the method is called thumbnail, it doesn’t mean it has to be used exclusively on thumbnails.
Crop an Image
We’ll use another tuple to crop our photos. This tuple looks a bit different than the one we used to scale images. Pass the crop() method the tuple (left, top, right, bottom).
Note: Pillow defines the (0,0) coordinate as the upper left corner of the image.
left: left boundary of the crop as the number of pixels to the right of the left side of the original imagetop: top boundary of the crop as the number of pixels below the top of the original imageright: right boundary of the crop as the number of pixels to the left of the right side of the original imagebottom: bottom boundary of the crop as the number of pixels above the bottom of the original image.
The crop() method lets you crop your image any way you want. Start at the edge, in the middle, or anywhere in between. Size and shape your crop however you wish. We’ll cover the more advanced functionalities of the crop() method in a future tutorial.
A Cropping Challenge
I challenge you to write a Python script that uses Pillow to crop the Badwater Basin photo in a 600×600 square centered around the middle of the photo. Think about what parameters you need, and how you would calculate those values. Like previous examples, the opened image will be stored in the img variable.
Here’s how I would do it. We’ll start with a list of parameters we need. All parameters are in pixels.
- The coordinates of the middle of the photo
- How far from each edge is 600 pixels from the middle?
- The image height and width
Calculations
No matter what the problem you’re trying to solve is, always start with what you know. In our case, we know the height (img.height) and width (img.width) of our photo.
To get the middle of the photo, simply cut the height and width in half.
middle_x = img.width / 2
middle_y = img.height / 2
Now that we know the coordinates of the center of the photo, just add or subtract 300 pixels from the center to obtain the parameters the crop() method requires. You’ll get a 600×600 image.
left = (img.width / 2) - 300
top = (img.height / 2) - 300
right = (img.width / 2) + 300
bottom = (img.height / 2) + 300
Put it all together to get the complete script.
#!/usr/bin/env python3
from PIL import Image

img = Image.open("badwater-basin.jpeg")

left = (img.width/2) - 300
top = (img.height/2) - 300
right = (img.width/2) + 300
bottom = (img.height/2) + 300

cropped = img.crop((left, top, right, bottom))
cropped.save("badwater-basin-cropped.jpg")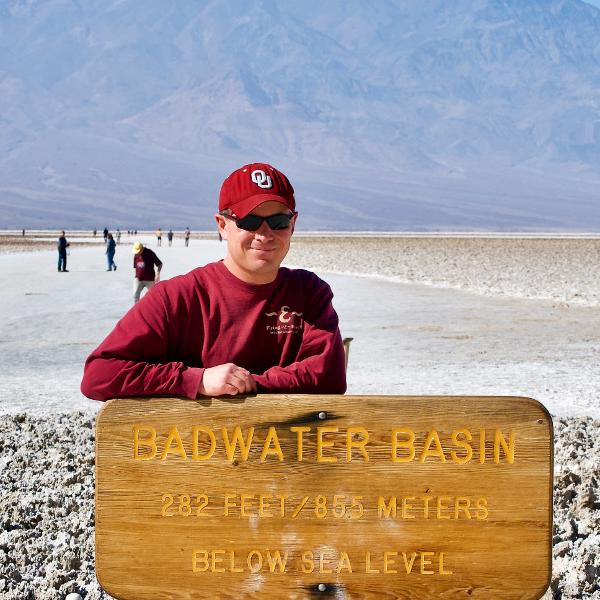
Add a Watermark with Python and Pillow
Watermarks have been a thorn in my side ever since I got into photography. It seemed like every time I created a photo album with my photo editing software, I forgot to add a watermark, or added watermark that was the wrong size, color, opacity, and/or font.
Thankfully, Pillow can automate the entire watermarking process for you. It an easy step that can be seamlessly integrated into your workflow.
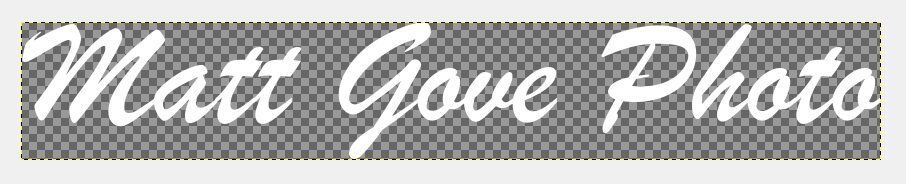
Create Your Watermark as a Transparent Background png Image
Before we can add a watermark, we need to create a watermark. Create your watermark in your preferred image editing program and save it as a png file with a transparent background. Here is mine.
With both an image and a watermark, we can dive into the code. First, read both the image (Badwater Basin) and the watermark into Pillow.
badwater_basin = Image.open("badwater-basin.jpeg")
watermark = Image.open("mgp_watermark.png")
Now for the tricky part. It’s time to add transparency to the watermark. We normally define opacity as a decimal or percentage on a scale from 0 to 1. However, Pillow expects the opacity as an integer from 0 to 255, which is called an alpha value. We’ll have to multiply our opacity by 255 and round it to get alpha. Let’s set our watermark at 40% opacity, or 0.4.
opacity = 0.4
alpha = round(opacity * 255)
The next block is a bit outside the scope of this tutorial, so I won’t go into it too much. It converts the watermark to a format that can be opaque or transparent and applies the alpha value to the watermark to set its opacity.
mask = watermark.convert("L").point(lambda x: min(x, alpha))
watermark.putalpha(mask)
To position the watermark on the photo, we’ll use a technique similar to how we cropped the image earlier. I normally put the watermark in the bottom right corner. However, there is a lot of white on the bottom of the Badwater Basin photo, so we’ll put the watermark in the top right instead so you can see it.
First, define a margin, in pixels, for how far to set the watermark from the edge of the image. Then, calculate the x and y coordinates to tell Pillow where to position the upper left corner of the watermark on the photo.
margin_x = 20
margin_y = 10

x = img.width - watermark.width - margin_x
y = margin_y
Finally, paste the watermark onto the photo and save the watermarked version.
badwater_basin.paste(watermark, (x, y), watermark)
badwater_basin.save("badwater-basin-watermark.jpg")
Here is the final script after putting everything together.
#!/usr/bin/env python3
from PIL import Image

badwater_basin = Image.open("badwater-basin-20210205.jpeg")
watermark = Image.open("mgp_watermark.png")

opacity = 0.4
alpha = round(opacity * 255)

mask = watermark.convert("L").point(lambda x: min(x,alpha))
watermark.putalpha(mask)

margin_x = 20
margin_y = 10

x = img.width - watermark.width - margin_x
y = margin_y

badwater_basin.paste(watermark, (x, y), watermark)
badwater_basin.save("badwater-basin-watermark.jpg")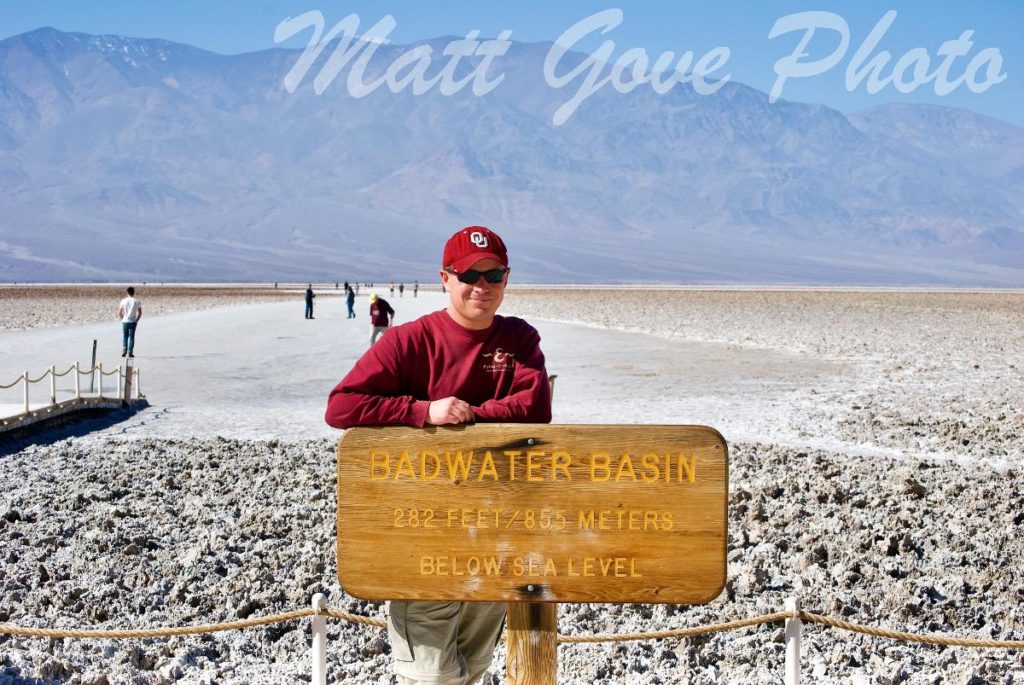
Two Real-World Examples of Python and Pillow
While these examples are all great, how do they apply to the real world? Let’s have a look at a couple of real-world examples that I routinely use in my day-to-day life.
Prep a Photo to Add to this Blog
If you’ve read my blog for any length of time, you’ve probably noticed that I use a lot of photos. Prepping large quantities of images for the blog can be extremely tedious. Consider my workflow.
- Scale the photo to a maximum width of 1200 pixels to balance load times with image quality.
- Scale the watermark to 38% of the width of the photo
- Set the watermark to 30% opacity
- Calculate coordinates for where to paste the watermark
- Paste the watermark in the lower right-hand corner of the photo
- Close the images
Combine what we learned above into a Python script.
#!/usr/bin/env python3
from PIL import Image

# Read in the image and the watermark
photo = Image.open("my_photo.jpg")
watermark = Image.open("mgp_watermark.png")

# Step 1: Scale the Image to 1200px
max_dimensions = (1200, 1200)
photo.thumbnail(max_dimensions)

# Step 2: Scale the Watermark to 38% the Width of the Image
watermark_width = 0.38 * photo.width
max_dimensions = (watermark_width, 99999)
watermark.thumbnail(max_dimensions)

# Step 3: Set the Watermark to 30% Opacity
opacity = 0.3
alpha = round(opacity * 255)
mask = watermark.convert("L").point(lambda x: min(x,alpha))
watermark.putalpha(mask)

# Step 4: Define Coordinates for Where to Paste the Watermark
margin_x = 20
margin_y = 10
x = photo.width - watermark.width - margin_x
y = photo.height - watermark.height - margin_y

# Step 5: Past the Watermark in the Lower-Right Corner of the Photo
photo.paste(watermark, (x, y), watermark)
photo.save("watermarked-photo.jpg")

# Step 6: Close the Images
photo.close()
watermark.close()
Add a Photo Album to the Matt Gove Photo Website
Complex workflows are where any kind of automation really shines. Automating the process to create a photo album for the Matt Gove Photo website with Python has saved me so much time since I wrote the script.
- Create the directory structure to hold the photo album and properly name each folder.
- A folder to hold the high-resolution images
- A folder to hold the thumbnails
- Create the high-resolution images that expand when a visitor clicks on a thumbnail. These photos are scaled to 1500 px and watermarked.
- Crop wide panoramas to a 3:1 aspect ratio centered in the middle of the photo.
- Save those images to the pictures folder
- Create thumbnails that are scaled to 200 px.
- Save the thumbnails in the thumbnails folder
- Create an album cover that’s scaled to 400 px and saved in the root directory of the album.
Executing this workflow manually using photo-editing software has taken me as long as 30 to 45 minutes in the past. Instead, the script now does the job in less than 5 seconds.
Conclusion
Photography is far from the first thing that comes to most people’s minds when they think of Python scripting and automation. Pillow is certainly not a replacement for professional editing software such as Lightroom or Photoshop, but instead is most powerful when coupled with those programs and working in tandem with them. This tutorial only scratches the surface of Pillow’s full potential.
Are you ready to start automating your photography workflow and freeing up time to focus on more important tasks? Get in touch today for more information or request a quote from Matthew Gove Web Development to get started with Python and Pillow today!
Top Photo: Victoria Falls – Queen Elizabeth II Wildlands Provincial Park
Washago, Ontario, Canada – August, 2019