Disclaimer: Working with electricity can be extremely dangerous. If you’re not comfortable working with electricity or circuitry, please consult an electrician. This blog and its owners are not responsible for anything that happens to you while you are working with electricity.
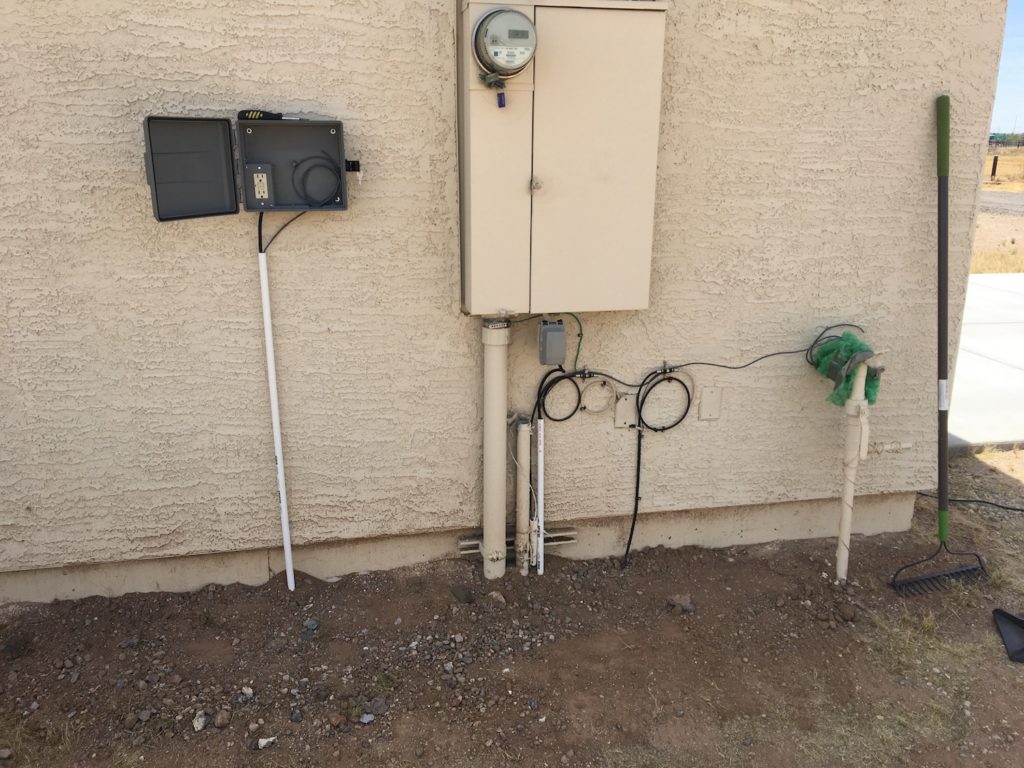
The sensors and database for my DIY weather station are up and running in my office. It’s finally time to install them in their permanent home. The first step is to mount the housing for the datalogger on the side of the house. I chose the spot because it’s on the north side of the house, where it’s out of direct sun (except for early evenings in the summer), and it’s right next to the junction box that brings the ethernet into the house. For the housing, I used a sprinkler timer box, which are readily available at any garden center or hardware store.
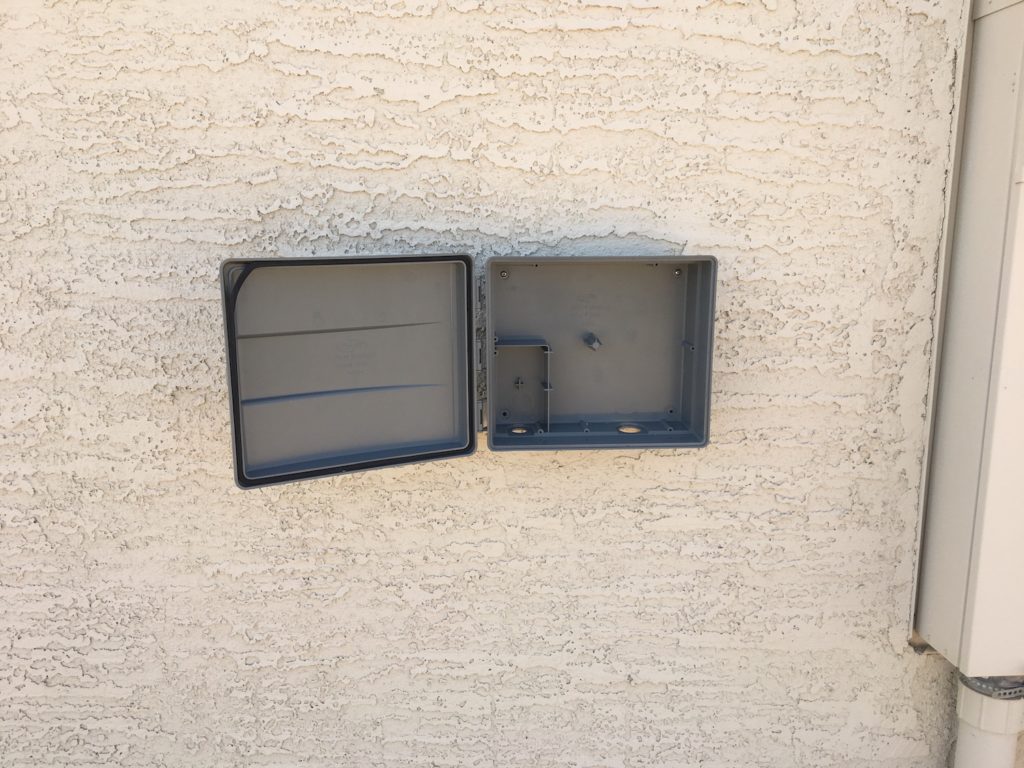
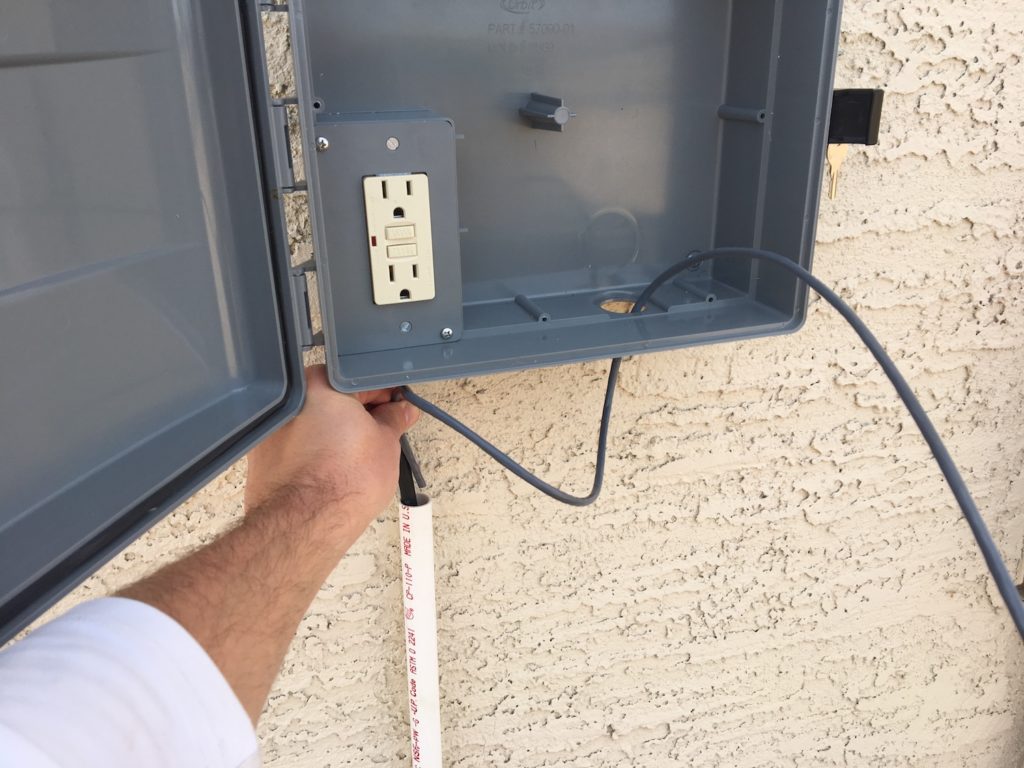
The sprinkler box comes with a GFCI outlet in it, providing a weatherproof location to plug in the Raspberry Pi that will be used as a datalogger. To connect the power, you’ll need some 14/3 wire to connect the new outlet to an existing circuit. Full disclosure: this setup likely does not comply with electrical codes. Please reference your local electrical codes if you want to bring your setup up to code.
Connect the Power Source
Important: Before doing anything with electricity, always turn the power off to the circuits with which you are working at the breaker. After turning the power off, test an outlet on the circuit to confirm that the power is actually turned off. You’d be amazed at how often you think you’ve turned the power off when you actually turned off a different circuit. Failure to shut off the power can result in serious injury or death.
First, peel back the jacket on the wire to reveal the three wires inside. Then strip the ends of the wires.
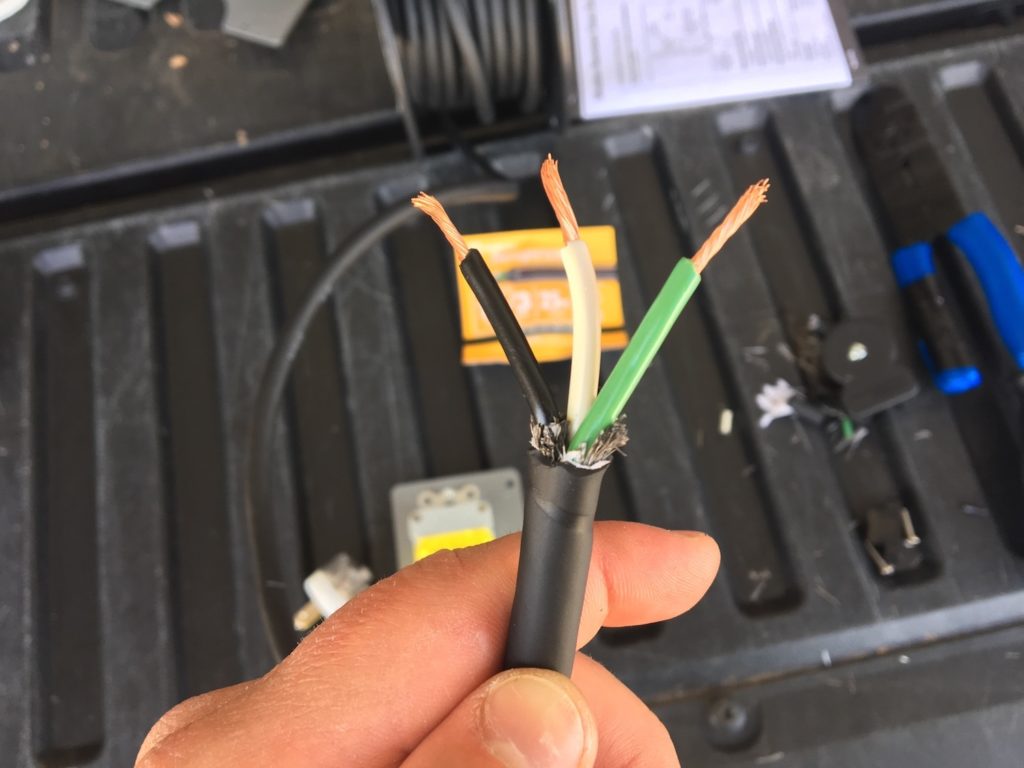
Next, insert the three wires into the corresponding terminals on the outlet. For a GFCI outlet, they must go in the end marked “Line”. Remember my “B-to-B” rule: black-to-brass. The black (hot) wire, which the electricity comes in on, goes to the brass screw. The white neutral wire, which returns the electricity to the source to complete the circuit, goes to the silver screw, and the green or bare wire goes to the ground terminal. Tighten the screws and give each wire a tug to ensure they’re secure in the terminals.

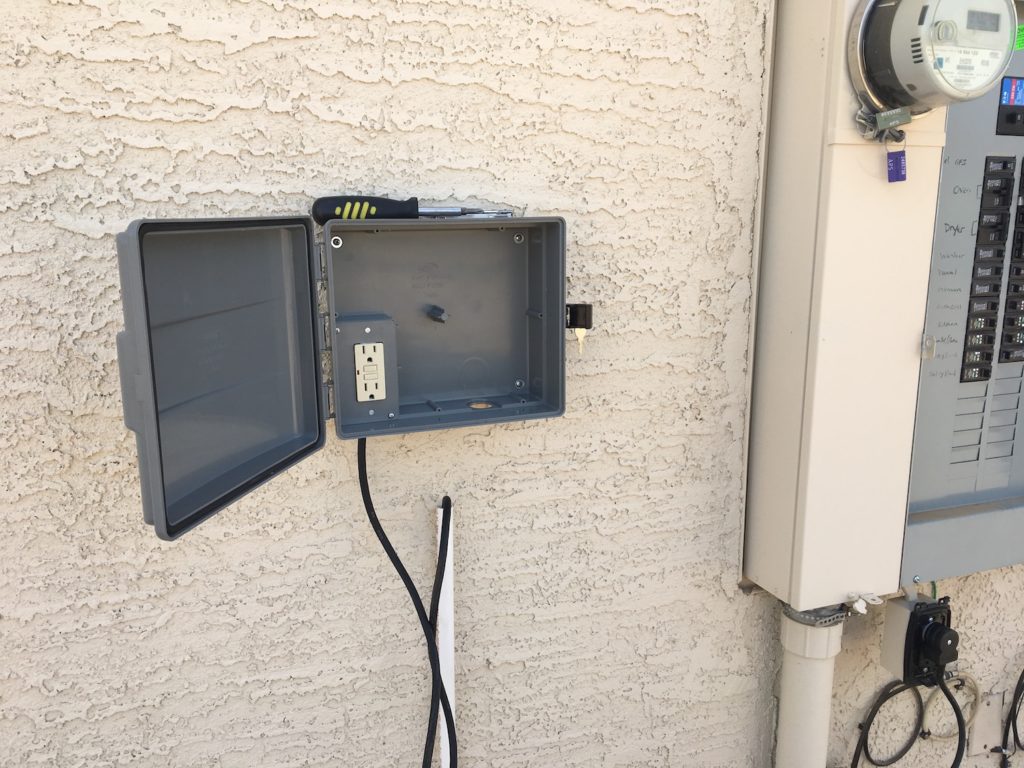
Next, run the wire through the hole in the bottom of the sprinkler box and screw the outlet into place. Connect the other end of the wire to the power source. I recommend you connect the power source in the same manner as you would add an outlet to any other circuit in the house – by connecting the wire to the “Load” terminals on any existing GFCI outlet.
Run the Wires for Electrical Power
If you’re running the wire through conduits or any other channels, run them through there now. Then connect the other end of the wires to the power source. I recommend temporarily turning the power back on and testing the outlet with a GFCI tester to make sure you wired everything correctly.
Run the Ethernet Cable
We’ll run the internet cable in a very similar manner. Run it through the other hole in the bottom of the sprinkler box, and through the same path as the electrical cables to your live network or internet connection.
Once the wires are all run, bundle any access wire, secure them with zip ties, and tidy everything else up.
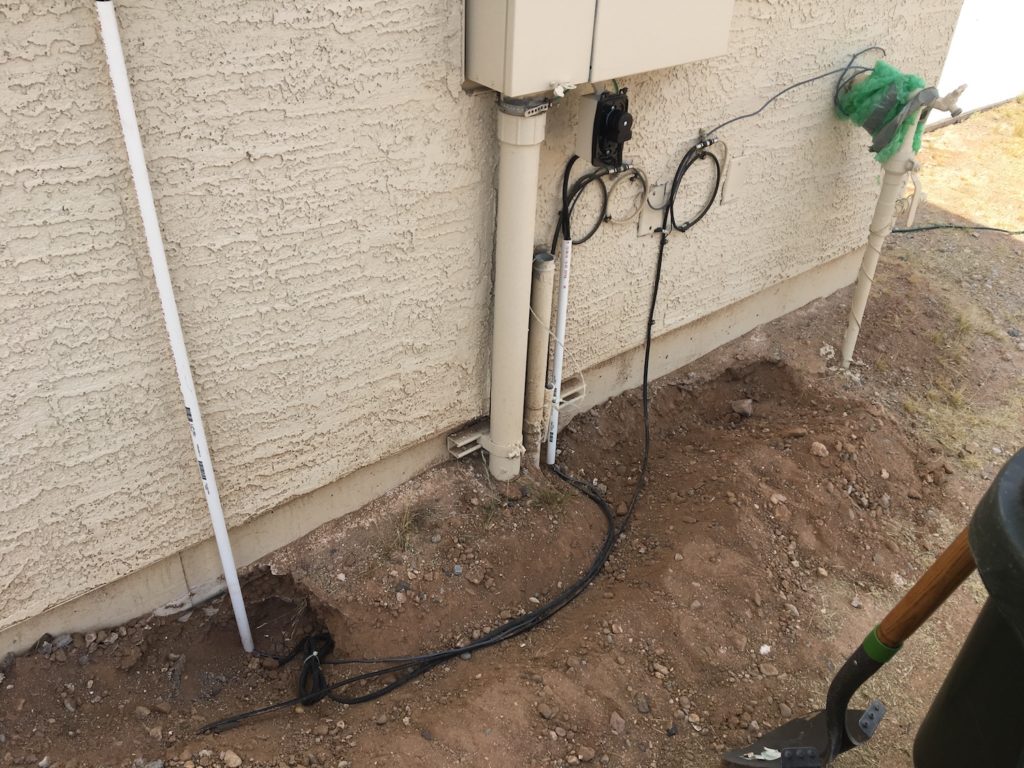
Finally, fill in the trench to bury the underground wires. Turn the power back on, and you’ll be ready for the next stage: installing the datalogger, connecting the sensors, and connecting it to the network. We will cover all that, and more, in the next installment of this series.