There can be a fine line between weather and landscape photography and videos. And it’s a line that I’ve both toed and crossed many times. When I first started storm chasing, the goal was simple: capture some of Mother Nature’s most powerful, yet beautiful creations. Interestingly, when I shifted from weather and storm chasing to landscape photography, my in-the-field strategy remained largely the same. Integrating weather into my landscape photography and travel videos have transformed them from decent to breathtaking.


So what’s my secret? I apply my education and experience in meteorology and storm chasing to make weather a focal point of my landscape photography and travel videos. Being proactive instead of reactive allows me to stay in front of changing weather. As a result, I am already in position ready to shoot whenever my target weather arrives. It doesn’t matter if I’m waiting for a sunset, a blizzard, or a thunderstorm. The strategy is the same. And today, I want to teach you that strategy so you can use weather to improve your landscape photography and travel videos.
A Word About Safety While Filming Weather
Whenever you go out in the field when hazardous weather is expected, safety should always be your number one concern. You can easily get yourself hurt or killed if you bite off more than you can chew. For example, don’t try to shoot lightning in the middle of an open field. If you don’t feel comfortable doing something, then don’t do it. It’s not worth hurting or killing yourself just to get “the shot”.
The High-Resolution Rapid Refresh (HRRR) Model
The U.S. Federal Government’s National Oceanic and Atmospheric Administration (NOAA) developed the HRRR model (pronounced “her”). As a result, its spatial domain is limited to the United States. Because of its extremely fine resolution, it is highly accurate, having never let me down once during my tenure chasing storms. My own intuition ignored the model a few times, and let’s just say those always ended in busts.
The HRRR has several key features.
- Initialized from the Rapid Refresh (RAP) model, which gets its data from the global GFS (American) model.
- 3 km resolution is fine enough to resolve most individual thunderstorms, making it an invaluable tool for storm chasing
- Runs once per hour, on the top of the hour
- Forecasts 48 hours into the future, a significant increase over its 12-hour forecasts when I started storm chasing
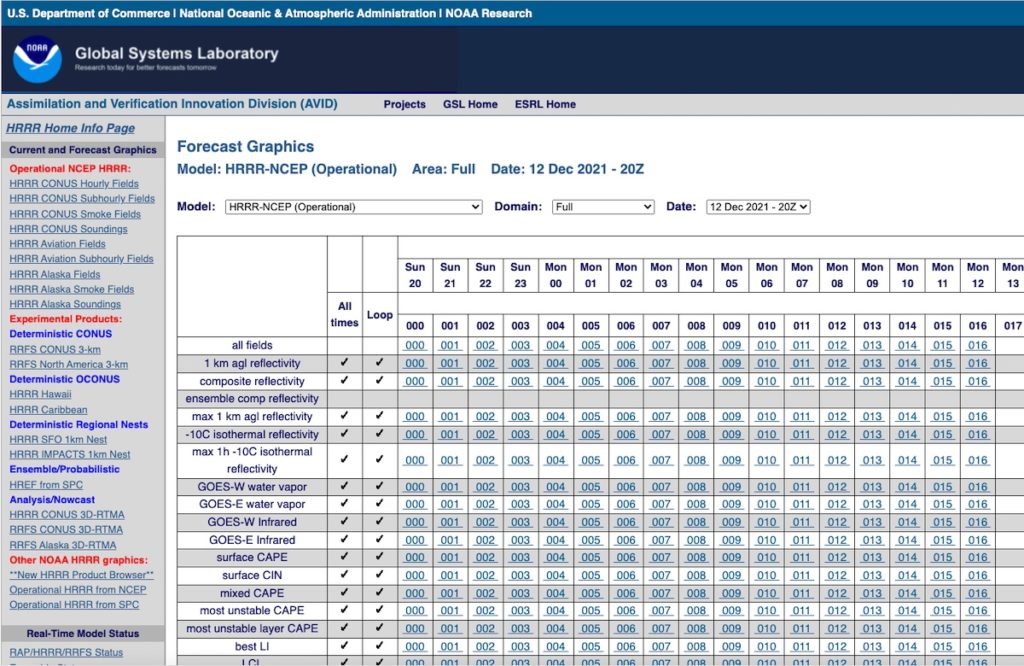
While you can easily get HRRR predictions from most modeling sites, I prefer to get it straight from NOAA. When you load the NOAA site, you’ll see an interface that looks like this. To zoom in on a particular geographic area, select a region from the “Domain” dropdown. The timestamps contain the day of the week and the hour of the day, in UTC. Each row is a different model parameter. Click on a cell for the parameter and forecast hour you want to see, or click on the check in the “Loop” column to see a loop of all times.
Basic HRRR Parameters
Before I begin a model analysis, I like to look at the basic weather parameters, both on a national and regional scale. Here are the HRRR parameters that correspond to the basic weather data. We’ll define them shortly once we dive into some examples.
| Weather Feature | HRRR Parameter |
|---|---|
| Temperature | 2m temp |
| Wind Speed and Direction | 10m wind |
| Wind Gust | 10m wind gust potential |
| Dew Point | 2m dew point |
| Relative Humidity | 2m RH |
| Barometric Pressure | surface pressure |
| Total Rainfall | total acc precip |
| Radar Reflectivity | 1 km agl reflectivity |
| Visibility | visibility |
We’ll dive into additional parameters that are specific to certain types of weather phenomena, photography, and videography later in this tutorial, but these are more than enough to get you going.
HRRR Time Zones
All HRRR parameters and runs are initialized and output using Universal Coordinated Time (UTC), or Greenwich Mean Time. UTC always uses the 24-hour clock, so you don’t need to worry about AM or PM. The model often uses Zulu notation to indicate times. For example, if the model date says “14 Dec 2021 – 17Z”, that means that the model was run on 14 December, 2021 at 17:00 UTC. In the model output, “Wed 08” indicates the model’s prediction for Wednesday at 08:00 UTC.
| Time Zone | Standard UTC Offset (Hours) | DST UTC Offset (Hours) |
|---|---|---|
| Eastern | UTC-5 | UTC-4 |
| Central | UTC-6 | UTC-5 |
| Mountain | UTC-7 | UTC-6 |
| Pacific | UTC-8 | UTC-7 |
| Alaska | UTC-9 | UTC-8 |
| Hawaii | UTC-10 | UTC-10 |
| Arizona | UTC-7 | UTC-7 |
Basic Storm Chasing Strategy for Weather Photography
You can ask three different storm chasers for their strategy, and you’ll probably get three very different answers. However, I prefer to keep my strategy as simple as possible. Not only because I’m a big believer in the moniker “Keep It Simple, Stupid”, but also because it makes it much easier to share my knowledge with you. Even though I designed this strategy for storm chasing, you can apply it to every type of landscape photography or travel video.
Step 1: 1 to 2 Days Before the Chase
Look at the Storm Prediction Center‘s (SPC) Day 2 and 3 Severe Weather Outlooks. Next, read the forecasts and discussions from your local National Weather Service Office. Finally, have a look at the weather models, looking for where the parameters best come together. At the very least, look at the GFS (American) and ECMWF (European) models. You may not quite be into the HRRR’s time range yet. However, if you are, please use the HRRR, too.
Your goal is to identify broad potential target areas. For example, you could identify Western Oklahoma, Central Kansas, and the Texas Panhandle as potential targets. While the outlook above doesn’t give the whole picture, targeting Northwestern Oklahoma and South-Central Kansas seems like a pretty safe bet. Don’t worry about specific locations within that target area yet. You’ll figure that out once the event gets a little closer and the models get a better idea of what’s going to happen.
Step 2: The Evening Before the Chase
Using the same resources you used in Step 1 to choose your preferred target area. If you can identify a backup target area in case your primary target doesn’t work out, great, but it’s certainly not necessary. At this point, you can start looking at specific areas inside your broader target area. You just want to identify them, since you won’t choose one until tomorrow.
Step 3: The Morning of the Chase
Have a final look at the models, SPC Outlooks, and local forecasts before you hit the road. Confirm or adjust your chosen target area as needed. After that, choose a specific area to start within that broader target area.
Additionally, you should identify a jumping off point before departing for the chase. The jumping off point should be close enough to where storms are expected to fire, but far enough in front of them so you’re not trying to outrun them just to get ahead. I often used small towns, truck stops, and scenic lookouts as jumping off points. Look for places where two major roads intersect. You want to quickly and easily be able to go north, south, east, or west once storms fire.
Step 4: Drive to Your Target Area
Once you’re on the road, you should be checking the HRRR every hour or two. That way, as you drive to your jumping off point, you can easily adjust it as necessary. Try to arrive at least 30 minutes before storms are expected to initiate so you can get your gear set up. If you pick your jumping off point correctly, you’ll be in perfect position when storms do fire.
Step 5: Wait for Storms to Fire
Once storms initiate, use doppler radar to identify the specific storm you want to chase. Your target storm should align with your goals for the chase. For example, you could pick very different storms depending on whether you were doing weather or landscape photography versus trying to deploy sensors into the storm. Then, the chase is on.
My Greatest Storm Chasing Success: The 19 May, 2012 Harper, Kansas Tornadoes
My greatest storm chasing success came when a hunch, model intuition, and a little luck all came together just perfectly. I could write an entire post telling this story, so I’ll give you the abridged version here.
For several days leading up to 19 May, 2012, it became clear that there was a very good chance for tornadoes near a triple point that was setting up in south-central Nebraska. If you’re unfamiliar with the concept of a triple point, it’s the point where a warm front, cold front, and dryline meet. Model runs the morning of the chase confirmed that Nebraska was the most likely spot for tornadoes.
I wasn’t all that keen on driving from Oklahoma all the way to Nebraska, so I instead decided to look for something closer to home. That’s when I turned to the HRRR. It showed a window of very favorable conditions for tornadoes opening along the Kansas-Oklahoma border just before sunset. It was a very brief window – only about 20 minutes or so – but it looked even better than Nebraska. Timing would be critical.
Not wanting to rely on just a single model, I looked at several other models. They all showed the same window for tornadoes opening up along the Kansas-Oklahoma border. I had to give it a shot. Before I knew it, I was on the road, heading north up Interstate 35.
Everything Comes Together Perfectly for Awe-Inspiring Weather and Landscape Photography
I got up to the Kansas-Oklahoma border about 2 hours before sunset. My first stop was right off I-35 in Blackwell, Oklahoma to set up my jumping off point. A quick look at the HRRR showed everything was still in place for tornadoes at sunset just north of the state line. I decided to head west and make Medford, Oklahoma my jumping off point, which gave me easy access to a northbound road (US-81) into Kansas.
Before long, clouds started to bubble up on the dryline out to the west. Satellite and radar confirmed the HRRR’s predictions that the storms were going to be north of the state line, so I decided to move my jumping off point up to Caldwell, Kansas. By the time I got to Caldwell, the storms had fired and were heading towards the town of Harper, Kansas. I continued north and the chase was on. By the time I got to US-160, the weather radio was already blaring with Tornado Warnings. All I had to do was head west.
Just east of Harper, I pulled off onto a side street and had the whole show to myself. There was not another vehicle around, let alone any chaser traffic. That cluster of supercells produced over a dozen tornadoes in about 20 minutes, capped off by a breathtaking EF-3 tornado packing winds over 160 mph. The setting sun behind it was just icing on the cake.


Then, just like that, our very brief window for tornadoes slammed shut. The tornado became rain-wrapped before lifting as the sun set and darkness set in.
The Sweetest Victory Lies in the Photography
As I made my way back to I-35 to head home, lots of storm chasers started passing me going the other direction. After being so void of vehicles the entire chase, I couldn’t believe how many storm chasers were now heading towards Harper. But I knew they were too late. The tornadoes were done. The window was closed.
Interestingly, I didn’t realize the sweetest part of my victory until the next morning when I turned on the local news. Remember that triple point up in Nebraska? It had completely busted. Have a look at the storm reports. The red dots are confirmed tornadoes.
As a result, all of the chaser traffic I encountered on my way home were everyone who had been up in Nebraska racing down trying (unsuccessfully) to catch the storms in Kansas. I was one of only a small handful of people who had gotten footage of tornadoes that day.
Severe Weather in Landscape Photography and Travel Videos
As you can probably guess, the most practical application of our storm chasing strategy is for severe weather photography. Here are some severe weather parameters you should consider for your photo or video shoot. I’ve defined them in layman’s terms to help you understand them. You need to look where all of these come together with the target values. Just one parameter being off can completely shut off all storm activity.
| HRRR Parameter | Definition | Target Value |
|---|---|---|
| Surface CAPE | How much fuel is available for the storm | > 1,500 J/kg |
| Surface CIN | Strength of the Capping Inversion that Prevents Storms from Forming | 0 J/kg |
| 0-6 km Shear | Amount of Rotation in the Low Levels of the Atmosphere | > 30 kt |
| 2m Dew Point | Amount of Moisture in the Atmosphere | > 65°F |
| LI | Amount of Lift in the Atmosphere | Less Than 0 |
Sunrises and Sunsets in Landscape Photography and Travel Videos
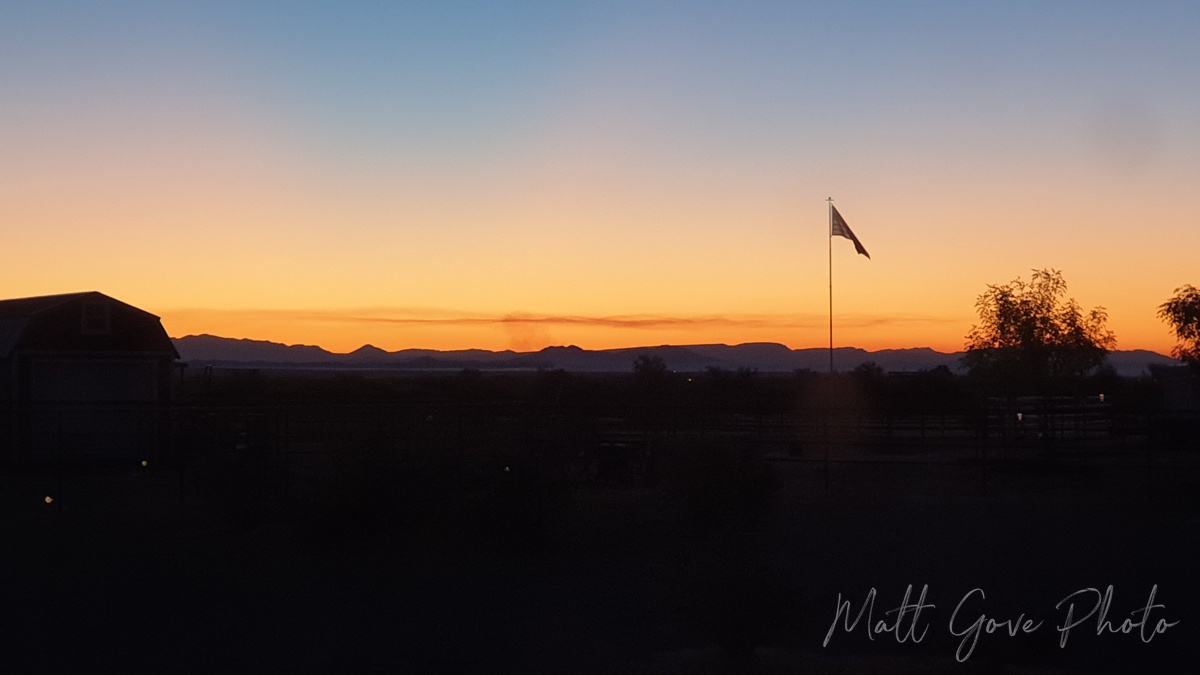
The Golden Hour is one of the most sought after period for landscape photographers and travel videographers. The low, warm light seems to make the landscape glow and the shadows dance. It’s a truly magical time of day. In fact, weather is what transforms you sunset landscape photography from okay to jaw dropping. Fortunately, the HRRR makes it pretty easy to identify the best location to film a sunrise or sunset.
Before we dive into the HRRR parameters, let’s recall what makes a good sunset. Brilliant sunset colors come from light refraction through clouds, dust, and other particles, so we need to examine cloud cover and thickness closely. Too many or too few clouds will result in a lousy sunset.

Unfortunately, the HRRR does not output cloud thickness as a parameter. However, it does output all of the parameters we need to calculate it. To get cloud thickness, simply use one of the following equations. The terms of each equation are defined below.
cloud thickness = cloud top height - ceiling
cloud thickness = cloud top height - LCL
Do note that if you’re using the second equation, cloud top heights are output in feet, while the LCL is output in meters! For best sunset colors, you want 25 to 45% coverage of thin, mid-to-high-level cirrus or cumulus clouds.
A Word About the Cloud Ceiling
The cloud ceiling is primarily used in aviation to indicate the height of the bottom of obstructing clouds. That means that if there is a cloud ceiling present, clouds will likely be thick enough to obscure the sunset, regardless of whether you find them in the low, mid, or high levels.
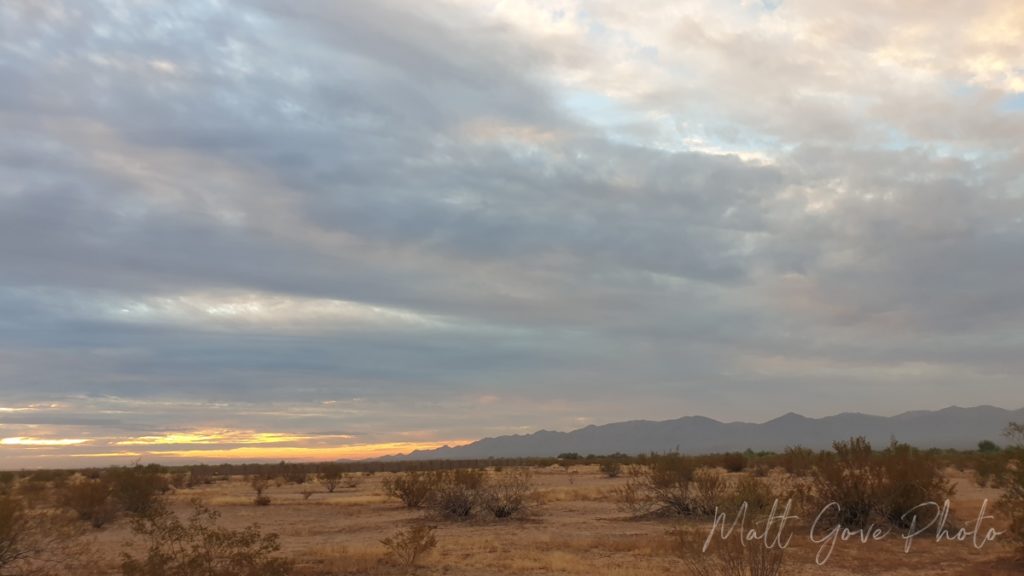
Additionally, don’t forget that rain showers can also make for spectacular sunsets. However, you should only try to integrate rain showers into your landscape photography in the summer. Small, pop-up summer showers can refract the light in spectacular ways. Winter showers are most often too thick and widespread to refract any light, which will ruin your sunset. Use the 1 km agl reflectivity parameter to evaluate rain shower potential.
| HRRR Parameter | Definition | Target Value |
|---|---|---|
| Total Cloud Cover | Percentage of Sky Covered in Clouds | 25 to 45% |
| Low-Level Cloud Cover | Percentage of Sky Covered in Low-Level Clouds | 0% |
| Mid-Level Cloud Cover | Percentage of Sky Covered in Mid-Level Clouds | 0 to 30% |
| High-Level Cloud Cover | Percentage of Sky Covered in High-Level Clouds | 25 to 50% |
| Cloud Top Height | Height of Top of Clouds Above Ground | Same as Ceiling or LCL |
| Ceiling | Height of Bottom of Obstructing Clouds Above Ground | 0% or N/A |
| LCL | Lowest Height Above Ground Water will Condense into Clouds | Min 2,000 to 3,000 m |
| 700 mb vvel | Vertical Velocity at ~10,000 feet altitude Upward (positive) velocity means increasing clouds, and downward (negative) velocity means decreasing clouds | At or near zero |
Finally, know what compass bearing the sun sets or rises at. That bearing varies by both location and by time of year.

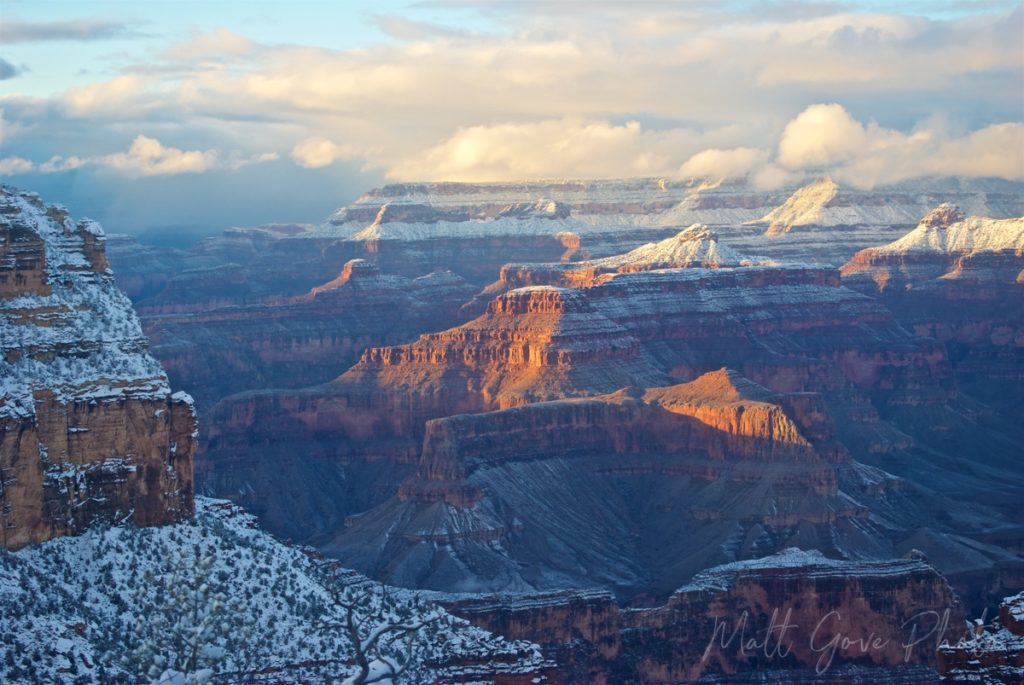
Winter Weather in Landscape Photography and Travel Videos
I break winter weather photography into two categories: inside the storm and post-storm. Both have their pros and cons. On one hand, you can capture the drama and intensity of blowing snow and bitter cold temperatures from inside the storm. On the other hand, a post-winter storm period can often be a spectacular 24-hour long Golden Hour to add breathtaking weather scenes to your landscape photography or travel videos. A fresh blanket of snow on a dramatic landscape makes for absolutely stunning photos and videos. For a textbook example, just have a look the Grand Canyon under a fresh blanket of snow.
Thankfully, both types of winter weather photography use the exact same strategy and parameters with the HRRR. The only difference is the timing.
| HRRR Parameter | Definition | Target Value |
|---|---|---|
| 2m, 925mb, 850mb, 700mb, 500mb temp | Temperature at various heights in the atmosphere up to ~17,000 feet / 5 km | All below 32°F or 0°C |
| precip type | Type of precipitation expected | Snow |
| total acc snowfall (10-1) | Total accumulated snowfall for the storm (use for post-storm photography) | > 2 inches |
| 1h snowfall (10-1) | Amount of snow expected to fall in the hour prior to the forecast interval (use for in-storm photography) | > 0 inches |
For in-storm filming, you may want to also consider both wind speed and visibility. Alternatively, if you’re heading out after the storm, you’ll generally want at least 5 miles (8 km) of visibility, with at least a little sunlight poking through the clouds.
Finally, a word of caution. Be very careful around winter weather. Roads can close and travel can become impossible with little to no warning. If you don’t feel comfortable doing something, don’t do it. Trust me, you do not want to be stranded in your car in the middle of a major winter storm. If you have four wheel drive and/or tire chains, use them.
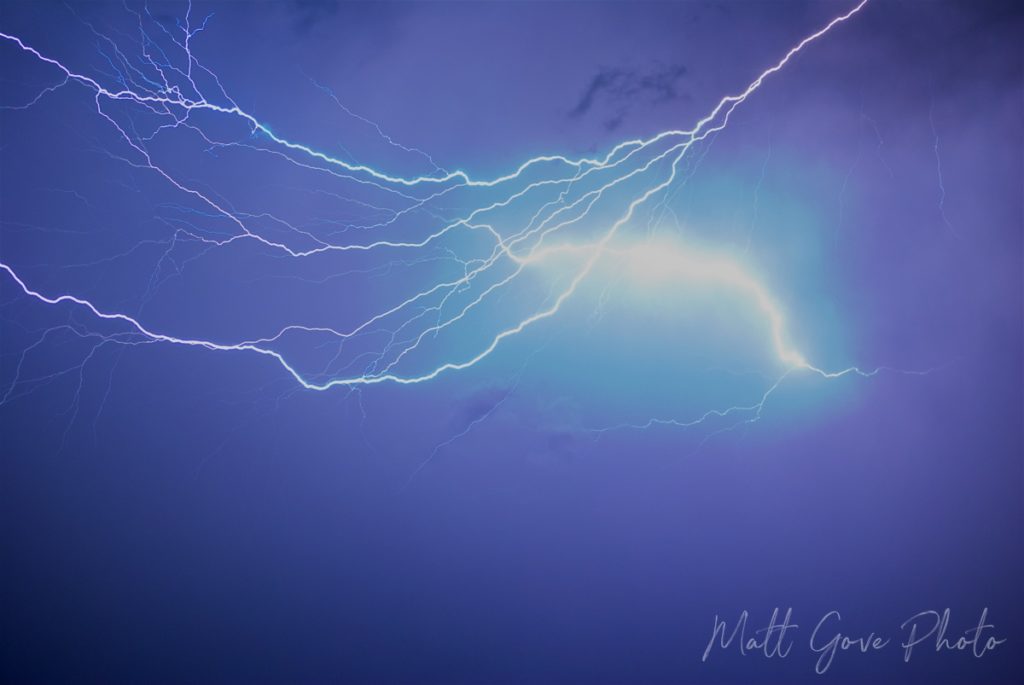
Lightning in Landscape Photography and Travel Videos
Lightning photography is one of the most challenging types of weather photography, but also one of the most rewarding. If just 5% of your lightning photos come out, you’re doing extraordinarily well. Thankfully, lightning happens everywhere, so you shouldn’t have to travel great distances to film it. In fact, you don’t need severe weather to get good lightning.
Before setting off to photography lightning, you must ensure your own safety. Lightning is one of the top weather killers not just in the United States, but around the world. Always shoot lightning from inside a building or car, or at the vary least, a grounded overhang. Do not under any circumstance stand under trees to try to film lightning. Trees often explode when struck by lightning, which will shower you in splinters, jagged wood, and molten sap.
Lightning Strategy
The strategy for lightning photography is staggeringly simple: set up in a dark spot at night, open the shutter, and let the picture take itself. If you’re shooting video, you can film lightning in the daytime, but even then, I still find your best shots come at night. Set up a ways from the storm to shoot lightning. That way, you’ll stay out of the rain. You’ll need a bit of luck, but when you do succeed, the results are, quite literally, electric.
While it’s impossible to predict exactly when and where lightning will strike, the HRRR will give you enough information to have a really good shot at it. Try to set up in a location where you don’t put yourself directly in the storm’s path.
| HRRR Parameter | Definition | Target Value |
|---|---|---|
| 10m wind | Wind speed 10 meters above the ground | < 10 knots |
| 10m wind gust potential | Potential wind gusts 10 meters above the ground | As close to the 10m wind speed as possible |
| lightning threat 3 | Expected number of lightning strikes per square kilometer per 5-minute time frame | At least 5 |
| surface CIN | Strength of inhibition that prevents thunderstorms from forming | 0 J/kg |
| surface CAPE | Amount of fuel or energy available for the storms to tap into | At least 500 J/kg |
| 1 km agl reflectivity | Expected radar image | No rain between you and your target storm |
Rainbows in Landscape Photography and Travel Videos
Most rainbow photos occur when you happen to look up and see a rainbow. But believe it or not, rainbow chasing is actually a thing. And unlike tornadoes, lightning, and blizzards, rainbows are one phenomenon you don’t have to worry about killing you while you’re out doing weather or landscape photography.
In order to see a rainbow, you need to put yourself between the sun and the rain, with the sun behind you and the rain in front of you. In order to see a rainbow in the afternoon or evening, you want to be looking east at the rain. On the other hand, you want to look west to see rainbows in the morning.
Additionally, sun angles play a critical role in finding rainbows. Unless you’re standing on top of a mountain or skyscraper, it’s much easier to put yourself between the sun and the rain when sun angles are low. As a result, you are much more likely to encounter rainbows during the Golden Hour period near sunrise and sunset than you are at high noon.
You can easily track cloud cover and precipitation with the HRRR. However, keep in mind that rainbows are far from guaranteed under any circumstance. No model is accurate enough to predict exactly where a rainbow will occur.
| HRRR Parameter | Definition | Target Value |
|---|---|---|
| total cloud cover | Percentage of the sky covered by clouds | Less than 50% |
| low-level cloud cover | Percentage of the sky covered by low-level clouds | Less than 20% |
| 1h precip | Rainfall expected in the 1-hour period of the HRRR forecast | Greater than 0 |
| 1 km agl reflectivity | Expected radar image. Use it to identify locations where you can position yourself between the rain and the sun. | N/A |
Weather in Seascape Photography
Seascapes are a stunningly effective way to integrate weather into your landscape photography and travel videos. Similar to winter weather photography, you have two options when it comes to the seascape side of landscape photography. With a few very unique exceptions, they require being in vastly different locations. If you’re looking to double-dip and get both types in one shoot, you’re likely going to be disappointed.
Cold Weather Seascape Photography
Largely grey and void of color, when taken correctly, viewers can almost feel the cold from a maritime layer that’s often thick and penetrating when they look at the photo or video. Locations such as downeast Maine, northern Europe, the Pacific Northwest, and the Canadian Maritimes come to mind when you think of cold weather seascapes. You’ll need to look at a few HRRR parameters
| HRRR Parameter | Definition | Target Value |
|---|---|---|
| total cloud cover | Percentage of the sky covered by clouds | 90 to 100% |
| low-level cloud cover | Percentage of the sky covered by low-level clouds | 90 to 100% |
| 10m wind | Wind speed 10 meters above the ground | Less than 10 kt |
| total acc precip | Total precipitation that has fallen | 0 inches |
Tropical Seascape Photography
White sand. Warm breezes. Salty air. Lit up with brilliant and vibrant greens, blues, and turquoises, tropical seascapes will whisk you off to paradise. They’re warm, inviting, and relaxing, putting you in that vacation mode whenever you look at them, seemingly an escape from your reality. That’s probably why you have them as your computer desktop and have them hanging throughout your office. You can almost taste the fruity cocktails before you snap back into reality.
Interestingly, tropical seascapes are one of the only types of outdoor photography or videography that are more striking in the middle of the day than during the Golden Hour. Applying color theory explains a lot. Warm low light doesn’t draw out greens and blues. In fact, it does the opposite.
Finally, don’t forget about the optics and the physics of your tropical seascape. Those brilliant colors come from the sunlight refracting in the water. In order to maximize the brilliance of those colors, the sun must be as high in the sky as possible. Thick cloud cover blocks much of the sunlight, significantly limiting the amount of light that can refract in the water. As a result, colors will appear dull, dim, and muted.
| HRRR Parameter | Definition | Target Value |
|---|---|---|
| total cloud cover | Percentage of the sky covered by clouds | Less than 20% |
| low-level cloud cover | Percentage of the sky covered by low-level clouds | 0% |
| LCL | Lowest Height Above Ground Water will Condense into Clouds | Greater than 2,000 m |
| ceiling | Height of Bottom of Obstructing Clouds Above Ground | N/A or Non-Existent |
| 700mb vvel | Vertical Velocity at ~10,000 feet altitude Upward (positive) velocity means increasing clouds, and downward (negative) velocity means decreasing clouds | At or near 0 |
| 10m wind | Wind speed 10 meters above the ground | Less than 10 kt |
Temperatures for Seascape Photography
You may have noticed that temperature is missing from the HRRR parameters for seascape photography and videos. Why is that? It’s because you don’t actually need cold temperatures for grey seascapes or warm temperatures for tropical beach photos. Don’t believe me? Have a look at these pictures I took at Lake Tahoe during the month of February. Temperatures that day topped out at 41°F (5°C), with plenty of fresh snow in the mountains.


Mist or Fog in Forest Landscape Photography and Travel Videos
I love forests shrouded in mist. They instill a sense of mystery and adventure, often whisking you away to another world. There’s a reason they are the setting of so many adventure movies. And I just love the striking contrast of the sun shining through the mist like a spotlight.
Best of all, you can find misty forests year round. One of my favorite locations to capture misty scenes is at Great Smoky Mountains National Park, which sits on the border between North Carolina and Tennessee. The sequoia and redwood forests in California are another top destination for misty forest photography and videography. Make sure you pick a destination that still has plenty of green in the forest. Early mornings in the spring and fall work best for mist, but you can get some stunning winter pictures in a forest of evergreens.
Before we dive into HRRR parameters, let’s have a look at what conditions make for the best mist photography. First and foremost, you need to have 100% relative humidity. Mist will not condense out of the air if the humidity is below 100%. Second, there should not be any wind. Wind causes mist and fog to mix out and burn off.
Go Up in Elevation to Lengthen Your Window for Mist
Once you start photographing fog and mist, you’ll be amazed at how quickly it comes and goes. This is especially true early in the day, as heat from the morning sun drops the relative humidity, rapidly burning off any mist or fog. However, there is one more secret weapon in our back pocket to maximize the length of your window for shooting mist: the much overlooked z-axis, or, to put in layman’s terms, controlling your elevation.
As you go up in elevation, the temperature cools. Because cooler air can’t hold as much moisture as warmer air, more moisture will condense out at higher elevations. As a result, fog and mist will hang around longer because it requires more energy to burn them off. But, like everything, it comes with a catch. If too much water condenses out, the mist and fog will be too thick to let the sunlight shine through. Those photos and videos can still be stunning, but you won’t get those really striking pictures of the sun shining through the mist. If you ever find yourself in this situation, go back down to lower elevations to thin out the fog and mist.
| HRRR Parameter | Definition | Target Value |
|---|---|---|
| 2m temp | Temperature 2 meters above the ground | Can be anything, but works best below 50°F/10°C |
| 10m wind | Wind speed 10 meters above the ground | 0 kt |
| 80m wind | Wind speed 80 meters above the ground | Less than 5 kt |
| 2m dew point | Dew point 2 meters above the ground | Equal to 2m temp |
| 2m RH | Relative humidity 2 meters above the ground | 100% |
| total cloud cover | Percentage of sky covered by clouds | Less than 50% |
| low-level cloud cover | Percentage of sky covered by low-level clouds | 0% |
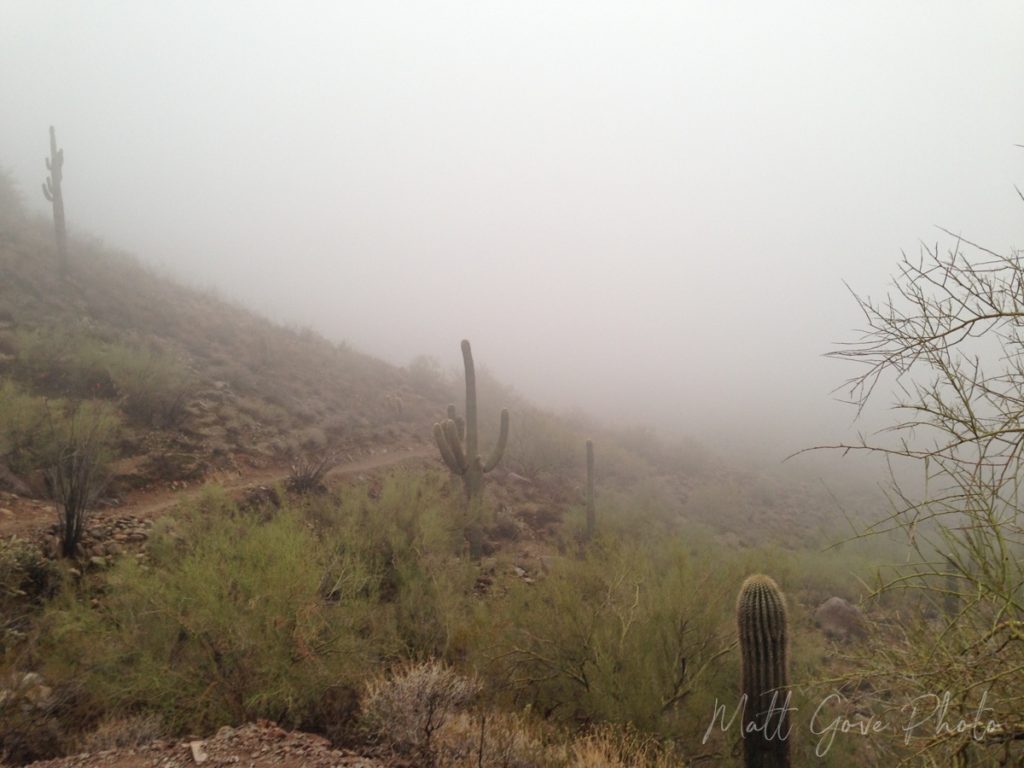
Live in the Desert? You’re Not Completely Out of Luck
And if you live in an arid climate, don’t worry, you can still get in on the action. Sunlight filtering through dust, pollution, or wildfire smoke can give you the same effect. Even in a desert climate like Arizona, you can still get spectacular mist scenery in the winter, when cooler temperatures are much more conducive to condensing out what little water there is in the atmosphere. Dawn after an overnight rain will present you with your best photo and video opportunities for mist and fog.
Get Started Boosting Your Efficiency Adding Weather to Your Landscape Photography and Travel Videos
NOAA’s High Resolution Rapid Refresh model is an incredibly powerful tool whose applications stretch far beyond storm chasing. When used with storm chasing strategy, you can take the guess work out of adding weather to your landscape photography and travel videos. Give yourself more control over your photo and video shoots and work much more efficiently. And at the end of the day, you’ll ultimately be able to boost your revenues. What are you waiting for?
Want more photography and video tips and tutorials? Sign up for our email list today and you’ll also get exclusive personalized deals to our store, early access to all of our travel guides and tutorials, and much more. We’ll deliver them directly to your inbox, twice a month, all for free.
Top Photo: A large dust storm swallows up a mountain range as it crosses from Mexico into the United States
Why, Arizona – July, 2018