As a photographer, you will run into the frustration of noise in their low-light photos and having to remove it at some point. It’s a much of a guarantee as taxes and death. No matter what you do in post processing, it seems like every adjustment you make only makes the noise in your photos worse. As a result, you only grow more frustrated.
Thankfully, we can turn to our secret weapon, Python, to remove noise from our photos. While it’s not well documented, Python has some incredibly powerful image processing libraries. With a proper understanding of the algorithms, we can use Python to remove nearly all the noise from even the grainiest of photos. And to put our money where our mouth is, we’re going to put our Python script up against Adobe Lightroom to see which one can better remove noise from photos.
The Problem with Noise in Low Light Photos
No matter your skill level, whenever you head out to take photos in low light, you probably dream of coming home with a photo that looks like this.

Instead, you come home with a monstrosity like this.
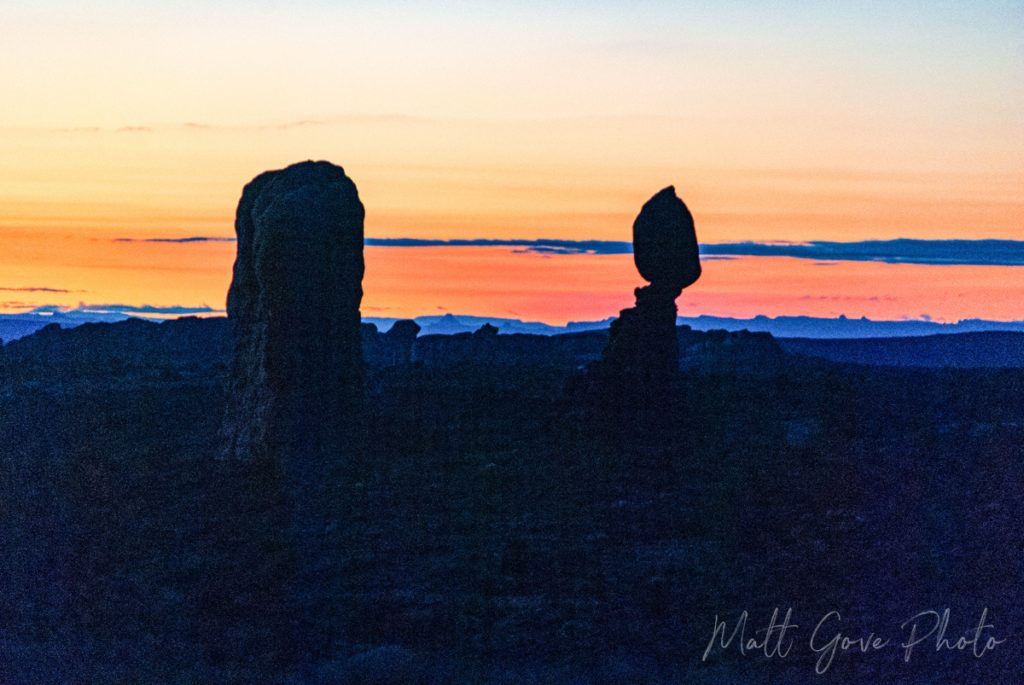
Despite these two pictures being taken with the same camera less than 20 minutes from each other, why did the first one come out so much better than the first? Yes, post-processing does play a small role in it, but the main culprit is the camera settings and the photo composition. No amount of post-processing can bring back lost data in a photo that’s incorrectly composed. Because the second photo is not correctly composed or exposed, much of the data in the bottom half of the frame is lost.
Let’s compare the two photos.
| Parameter | First Photo | Second Photo |
|---|---|---|
| Time of Sunset (MST) | 4:57 PM | 4:57 PM |
| Photo Timestamp (MST) | 5:13 PM | 5:29 PM |
| Sun Angle | Sun Behind Camera | Looking into Sun |
| Shutter Speed | 1/20 sec | 1/10 sec |
| Aperture | f/4.0 | f/5.3 |
| ISO Level | 800 | 800 |
| Focal Length | 55 mm | 160 mm |
Poor Composition Leads to Noise in Photos
From the photo metadata, we can easily conclude that the difference between the two shots is indeed the composition. More specifically, it’s the sun angle. When you take a picture looking into the sun, it will be higher contrast than a picture that’s taken with the sun behind you. When taken to extremes, you can actually have data loss at both the dark and light ends of the spectrum.
And that’s exactly the result when you take the photo a half hour vs 15 minutes after sunset. Because the second photo looks into the sunset, being further past sunset exacerbates the increase in contrast. As a result, you need to choose whether you want to properly expose the dark land or the colorful sky. You can’t have both. On the other hand, the first photo is able to capture the full spectrum of light that’s available, resulting in the spectacular dusk colors.
What Causes Noise: A Crash Course in ISO Levels
The ISO level sets how sensitive you camera is to light. Most cameras set the ISO levels automatically by default. The more sensitive your camera is to light, the brighter your photos will be. Lower ISO levels result in sharper images, while high ISO levels lead to grain in your photos.
Exactly how much grain appears in your photos depends on your camera’s sensor size. Professional cameras with large sensors often don’t have much of an issue with grain. On the other end of the spectrum, small or entry-level cameras are much more sensitive to grain because their sensors are so much smaller. Tiny sensors are why cell phone cameras struggle so much in low light. The technology has certainly gotten better over the past five years, but it’s still far from perfect.
On a bright, sunny day, use low ISO levels to keep photos sharp and avoid overexposing them. Alternatively, use high ISO levels for low light or night photography. Under normal conditions, your ISO levels should be between 200 and 1600. However, ISO levels on some very high end cameras can reach as high as 2 million.
Even Professional Image Processors Like Adobe Lightroom Can Only Do So Much to Remove Noise from Your Photos
As powerful as Adobe Lightroom is, it has its limits. You can’t just blindly take photos in low light and expect to turn them into masterpieces with some combination of Lightroom and Photoshop. As we mentioned earlier, no amount of post-processing can recover lost data in your photos. It’s up to you to properly compose your photos and use the correct camera settings.
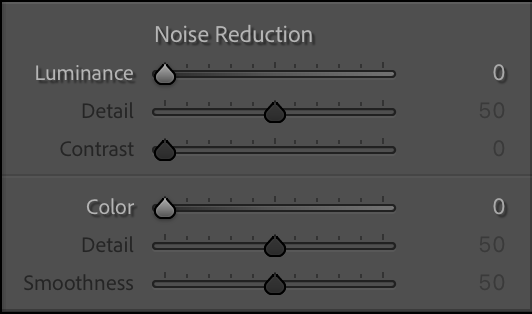 However, even with proper composition, professional image processors like Adobe Lightroom can only get rid of so much noise. Adobe Lightroom does a spectacular job getting rid of much of the noise in your photos, but you’ll eventually find yourself in a situation where there’s just too much noise for it to handle.
However, where Adobe Lightroom leaves off, our secret weapon takes over.
Python Has Powerful Image Processing Capabilities
It’s not well advertised, but Python has incredibly powerful image processing libraries that as a photographer, you can use to boost both your productivity and income. However, I want to caution that you should use Python as a tool to compliment Adobe Lightroom, not replace it. Being able to write your own scripts, functions, and algorithms in Python to add to the functionalities of Lightroom is incredibly powerful and will set you apart from just about every other photographer.
Indeed, I do my post processing with Adobe Lightroom. Afterwards, I use Python to format, scale, and watermark pictures that I post both to this blog and to the Matt Gove Photo website. When I used to write blog posts that had lots of pictures (and before I had Adobe), it often took me upwards of an hour or more to manually scale and watermark each image. Then I had to make sure nothing sensitive was being put on the internet in the metadata. That all can now be accomplished in just a few seconds, regardless of how many pictures I have. Furthermore, my Python script will automatically remove sensitive metadata that I don’t want out on the internet as well.
You may recall that in some of our previous Python tutorials, we have used the Python Imaging Library, or Pillow, to process photos. Today, we’ll be using the OpenCV library to remove noise from our photos.
How Python Algorithms Remove Noise From Photos
Whenever you write Python code, you should try to understand what built-in functions are doing. This will not only give you a better understanding of what your script is doing, but you will also write code that is faster and more efficient. That’s especially critical when processing large images that require lots of computing power.
Example: Removing Noise from COVID-19 Data
Before diving into our photos, let’s look at a very simple example of removing noise from a dataset. Head over to our COVID-19 dashboard and look at the time series plots of either new daily cases or new daily deaths. Without any noise removal, the plots of the raw data are messy to say the least.

To smooth the data curves and remove noise, we’ll use a moving average. For every data point on the curve, we’ll calculate the average number of new daily cases over the previous seven days. You can actually average as many days as you want, but the industry standard for COVID-19 data is seven days. We’ll plot that 7-Day Moving Average instead of the raw data. The resulting curves are much cleaner and presentable.

People use moving averages more much more than just COVID-19 data. It’s often used to smooth time series in the Stock Market, scientific research, professional sports, and much more. And we’ll use that exact same concept to remove noise in our photos.
How to Average Values with Python to Remove Noise in Photos
There are several ways to go about doing this. The easiest way is if you take several versions of the same shot, lay them on top of each other, and average the corresponding pixels in each shot. The more shots you take, the more noise will be removed. To ensure that your scene does not shift in the frame as you take the shots, use a tripod.
Mathematically, noise is random, so averaging noise pixels will effectively remove the noise. The scene that is actually in your shot does not change, so the non-noise pixels should far outnumber the noise pixels when you calculate the average. As a result, calculating the average removes the noise.
Consider the following equations. For the sake of this argument, let’s say you’re looking at just a single pixel. The actual value of the pixel in the scene is 10. However, in four of your shots, noise is introduced, and the camera records values of 4, 15, 9, and 18. Remember that the average is the sum of the values divided by the number of values.
In your first attempt, you take 10 shots of the scene. How would you do in noise removal?
average = ((6*10) + 4 + 15 + 9 + 18) / 10 = 106 / 10 = 10.6Not bad, seeing as the actual value of the pixel should be 10. But we can do better. Instead of taking 10 shots of the scene, let’s take 100 instead.
average = ((96*10) + 4 + 15 + 9 + 18) / 100 = 10.06That’s much better. It may not seem like much, but even just a small change in value can make a big difference for removing noise.
What Does This Method of Removing Noise From Photos Look Like in Python
Believe it or not, we can write the “stacking average” algorithm to remove noise from photos in just 12 lines of Python. We’ll use numpy for the calculations because it can natively store, calculate, and manipulate grids or matrices of data with just a line or two of code. As a result, all of the photo data will remain in the grid or matrix of pixels we’re familiar with. We don’t need to break it down into rows, columns, or anything else.
First let’s make sure you have installed numpy and OpenCV. If you haven’t, you can easily install them with pip. Open a Terminal or Command Prompt and execute the following commands.
pip3 install numpy
pip3 install opencv-python
Next, it’s time to write our Python script. Let’s start by importing everything we need. The cv2 library we’re importing is part of OpenCV.
import os
import numpy as np
import cv2
Second, tell Python which folder the image you’ll be averaging are stored in. Then list their filenames, skipping any hidden files that are in the image directory.
folder = "noise-imgs"
image_files = [f for f in os.listdir(folder) if not f.startswith('.')]
Third, open and read the first image into the average variable using OpenCV. Store pixel data as a numpy floating point number. You’ll use this variable to store image data and calculate the average of the image pixels.
path = "{}/{}".format(folder, files[0])
average = cv2.imread(path).astype(np.float)
Fourth, add all of the remaining images in the directory to you average variable. Don’t forget to skip the first image because we’ve already added it in the previous step.
for f in files[1:]:
    path = "{}/{}".format(folder, f)
    image = cv2.imread(path)
    average += image
Fifth, divide your average variable by the number of images to calculate your average value.
average /= len(image_files)Finally, normalize the averaged image and output it to a jpeg file. The cv2.normalize() function boosts the quality, sharpens the image and ensures the colors are not dark, faded, or washed out.
output = cv2.normalize(average, None, 0, 255, cv2.NORM_MINMAX)
cv2.imwrite("output.jpg", output)
That’s it. There are only 14 lines of code. It’s one of the easiest scripts you’ll ever write.
Example: Dusk in the Oregon Pines
We’ll throw our Python algorithm a tough one to start. Let’s use a photo of a stand of pine trees in Oregon taken at dusk on a cloudy winter night. Here’s the original.

The photo is definitely grainy and really lacks that really crisp sharpness and detail. I don’t know about you, but I’d be tempted to just throw it away at first glance. However, what happens if we let our Python algorithm have a crack at removing the noise from the photo?
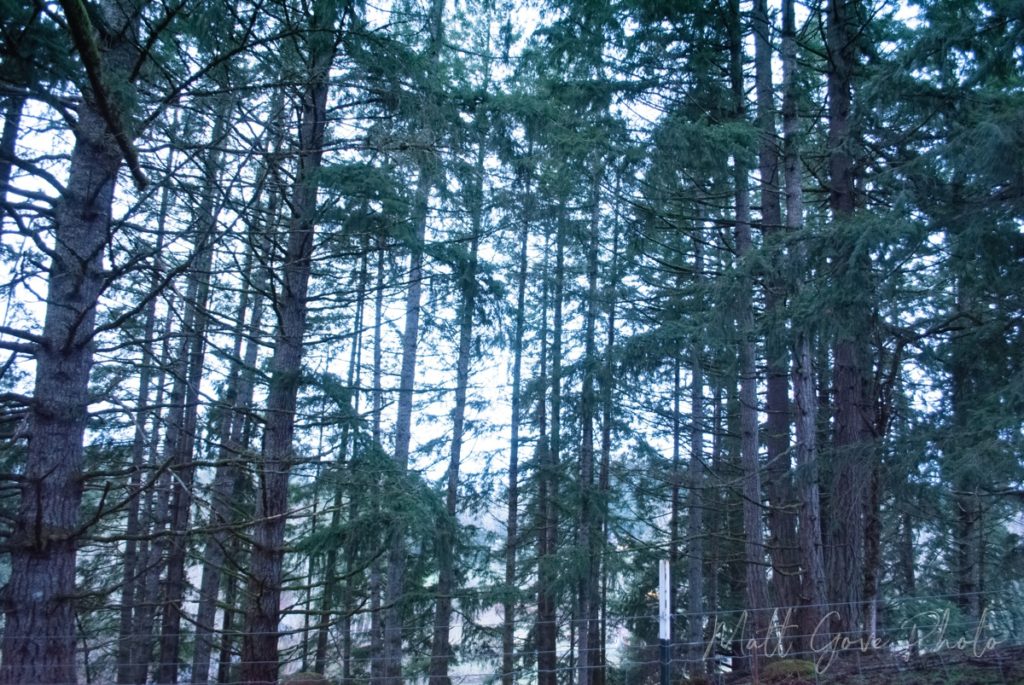
That looks much better! I’ll admit, the first time I ran the algorithm, I was absolutely floored at how well it worked. The detail was amazingly sharp and crisp. I unfortunately had to shrink the final image above to optimize it for the web, so the detail doesn’t appear quite as well as it does in the original. For the ultimate test, we’ll put our Python algorithm up against Adobe Lightroom’s noise removal shortly.
A Travel Photography Problem: What Happens If You Only Have a Single Shot and It’s Impossible to Recreate the Scene to Get Multiple Shots?
Good question. This is a common problem with travel photography, and is why I always encourage you to take multiple shots of things while you’re traveling. You never know when you might need them. Unfortunately, the above method really doesn’t work very well in this case. However, there are other ways to remove the noise.
We’ll use the same strategy to remove the noise as we did for the COVID-19 data. But instead of averaging over the previous seven days, we’ll average each pixel or cluster of pixels with the pixels that surround it. However, there’s a catch, here. The more layers of pixels you include in your average, the less sharp your image will be. You’ll need to play around to see what the exact balance is for your specific photo, but the OpenCV documentation recommends 21 pixels.
Thankfully, the OpenCV library has this algorithm built into it, so we don’t need to write it.
cv2.fastNlMeansDenoisingColored(source, destination, templateWindowSize, searchWindowSize, h, hColor)sourceThe original imagedestinationThe output image. Must be same dimensions as source image.templateWindowSizeSize in pixels of the template patch that is used to compute weights. Should be odd. Defaults to and is recommended to be 7 pixels.searchWindowSizeSize in pixels of the window that is used to compute weighted average for given pixel. It’s value should be odd. Defaults to is recommended to be 21 pixelshLuminance component filter component. Bigger h value perfectly removes noise but also removes image details, smaller h value preserves details but also preserves some noisehColorColor component filter component. 10 should be enough to remove colored noise and do not distort colors in most images.
When we run the image through the OpenCV algorithm, it outputs the following.

The noise is certainly removed, but the image is still very dark and you can see the fuzziness around the edges. To sharpen the image back up, go back into Lightroom and find the original image. Remove as much of the noise from the original image as possible in Lightroom, and then export it. Next, average the OpenCV image and the Lightroom image using the stacking method from the previous section. That will both sharpen the image and brighten the colors.
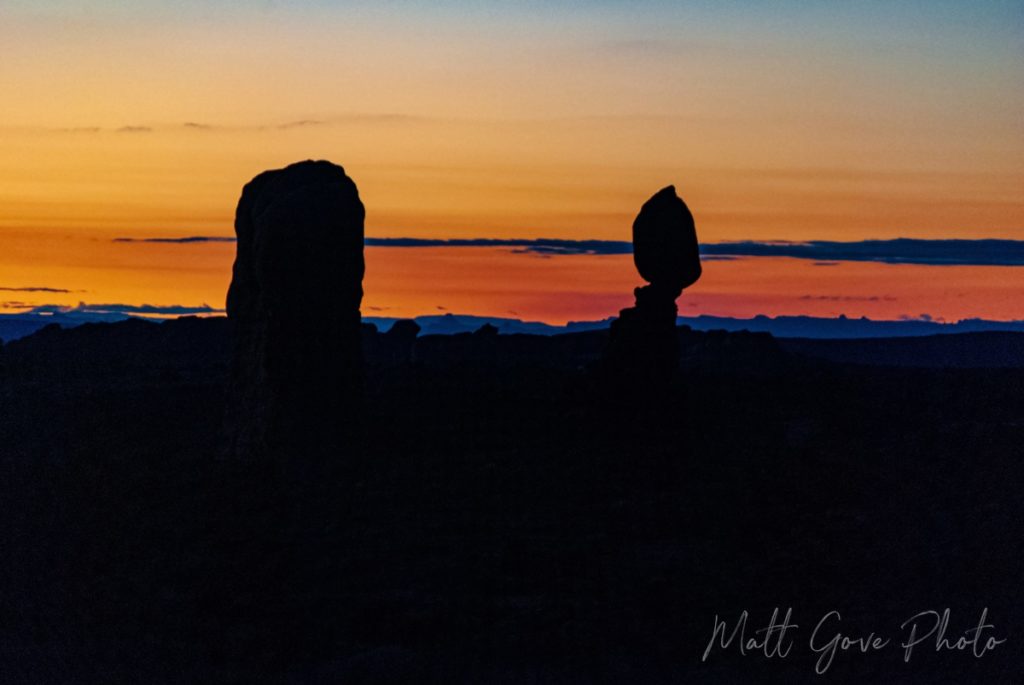
That looks much better than the original photo. Other than a little touch-up post processing in Lightroom, that’s about as much as we can help this photo.
How Does Our Python Script Hold Up Against Adobe Lightroom’s Noise Reduction?
All right, it’s time for the ultimate test. It’s time to see how our Python algorithm does against Lightroom’s noise reduction capabilities. If you read the title of this post, you can probably guess how this went. Turns out it wasn’t even close. Our Python script blows Lightroom out of the water.
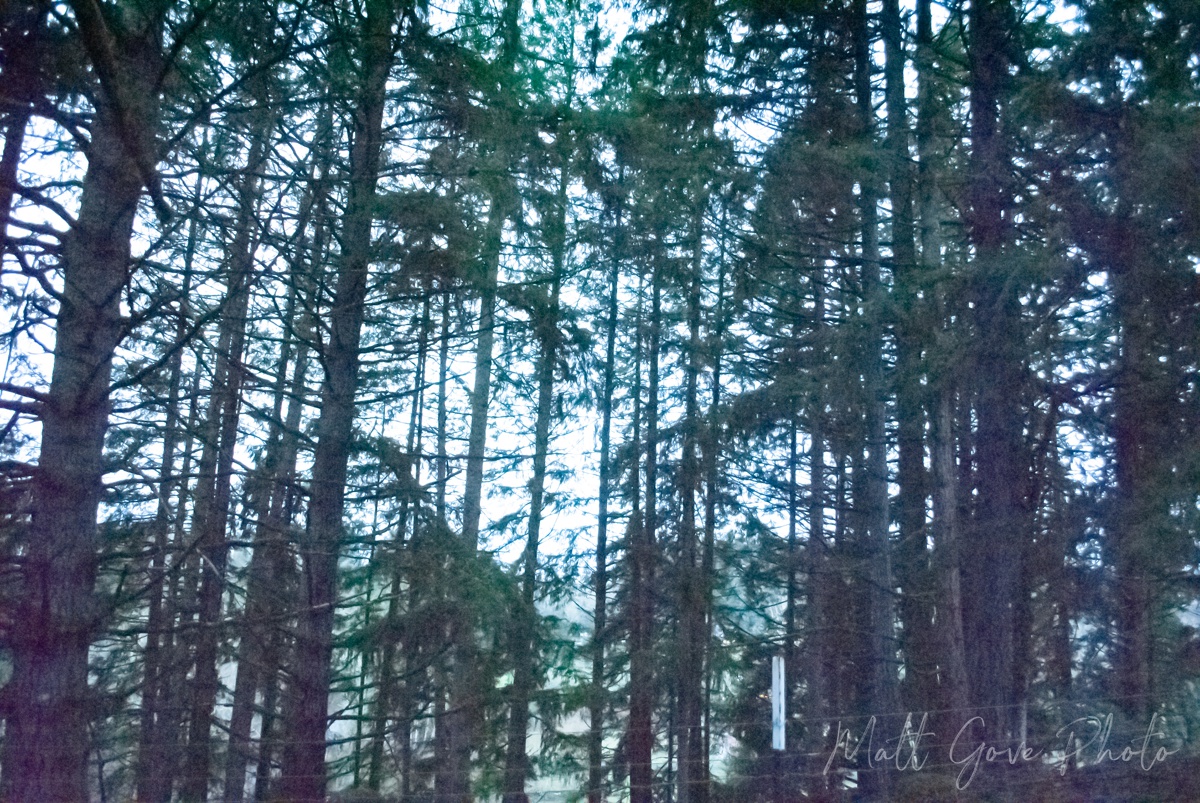

Right: Noise Removed from Photo with our Python Algorithm
Despite the results, I want to caution you that this comparison is a bit like comparing apples to oranges. Sticking with the pine tree reference, it would be like cutting a tree down with a chainsaw vs. a hand saw. Because Lightroom only has access to the single photo, it must use the algorithm that takes a cluster of pixels and averages the pixels surrounding it to remove the noise. Do you notice how much sharper the Python image is compared to the Lightroom image? It’s because our Python algorithm has far more resources available to it to remove the noise from the photo. 63 times the resources to be exact. That’s why it’s not exactly a fair comparison.
Lightroom vs. Python Comparison on a Level Playing Field
To level the playing field, forget about averaging over multiple photos to remove the noise. Let’s say we only took one photo of the pine forest in Oregon. As a result, we can use only the single original image. We’ll process it using the same method we did for the sunset at Arches National Park in the above section. When we put it up against Lightroom this time, it’s a much closer contest. However, I still give the edge to the Python algorithm because the final image is noticeably sharper.

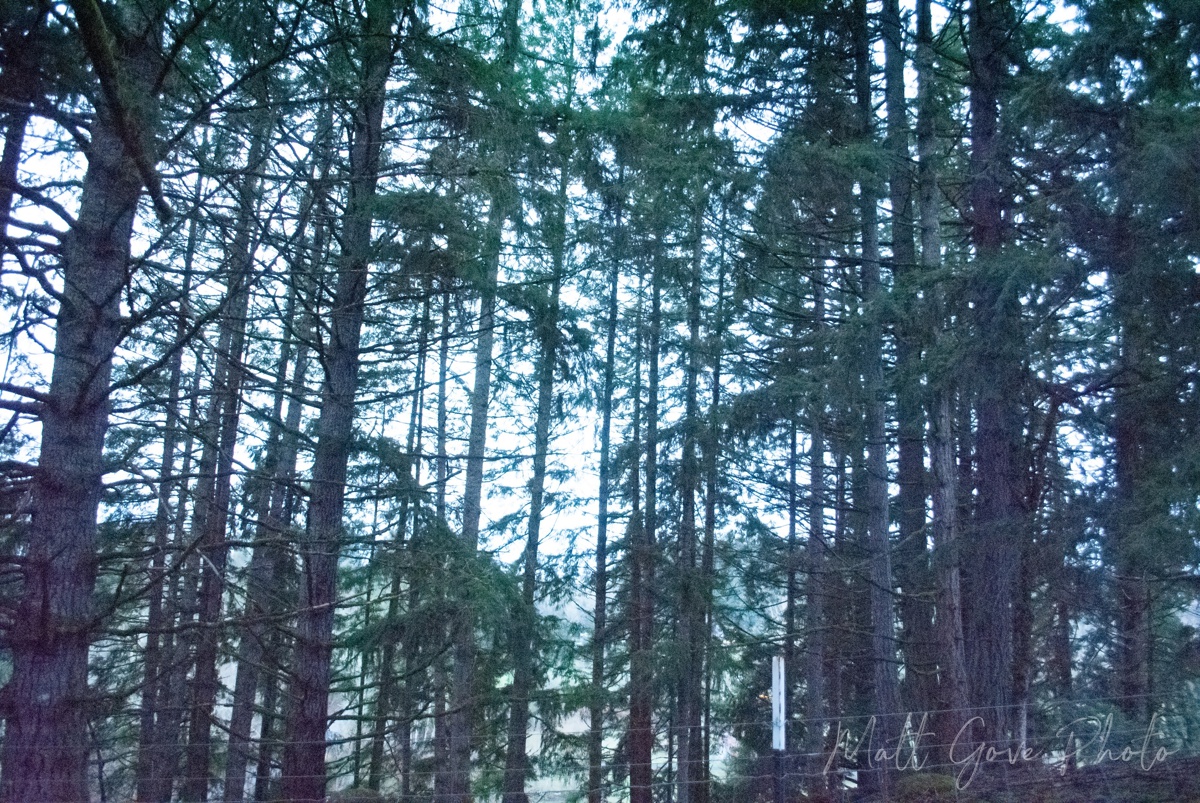
Right: Noise Removed with Python, without averaging over multiple shots
Want to Try the Python Script Yourself?
If you want to try out any of the Python algorithms we covered in this post, please download the scripts for from out Bitbucket repository.
Conclusion
Removing noise from photos is an endless frustration for photographers at all skill levels. To add insult to injury, high-end image processors such as Adobe Lightroom can only do so much to remove noise. However, with mathematical knowledge of how noise works, we can write an algorithm that does even better than Lightroom. And best of all, it’s only 14 lines of Python code. You can actually apply these algorithms to videos as well, but that’s a discussion for another day.
However, even though we put our algorithm up against Lightroom, we mustn’t forget that as photographers and image processors, Python must be used as a tool to complement Lightroom, not replace it. Because when we pit the two against each other, it’s only us that suffer from reduced productivity and a less effective workflow. If you’d like to boost your productivity by adding Python to your photography workflow, but don’t know where to start, please reach out to me directly or schedule a free info session today. I can’t wait to see what the power of Python can do for you.